
A delayed item of baggage and poor distribution of my underwater photography gear on my recent trip to Indonesia resulted in me having no clamps to attach any external lighting to my camera housings for the first day’s diving. While a bit frustrating it gave me a chance to go back to the basics that I started out doing underwater photography with, just a compact camera in a housing. I opted to use my Olympus TG6 and in this blog I’ll share some of the images I took and explain how I achieved them.
Using just the built-in flash as your light source doesn’t give the same ability to creatively light subjects as a strobe on an arm system. But as a low cost way of getting marine life images for ID it’s very effective.
Underwater Housing
When it comes to using your Olympus or OM System TG camera without an external light source not all underwater housings are created equal. Many of the housings on the market such as the Ikelite, Nauticam and Isotta don’t have a window in them to allow the built-in flash to be used. While the Seafrogs housing does have a window I have had a number of users report to me that they found the diffuser fixed to the housing is too opaque and blocks most of the light.
That’s one of the reasons why the housing for the TG6 and 7 that I use and recommend to my customers is the Olympus/OM System PT-059. While it is only rated to 45 metres depth it has a window for the built-in flash and a diffuser that spreads the light well without blocking too much of it. Down the line when you do want to add accessories to your setup the PT-059 is very well supported.
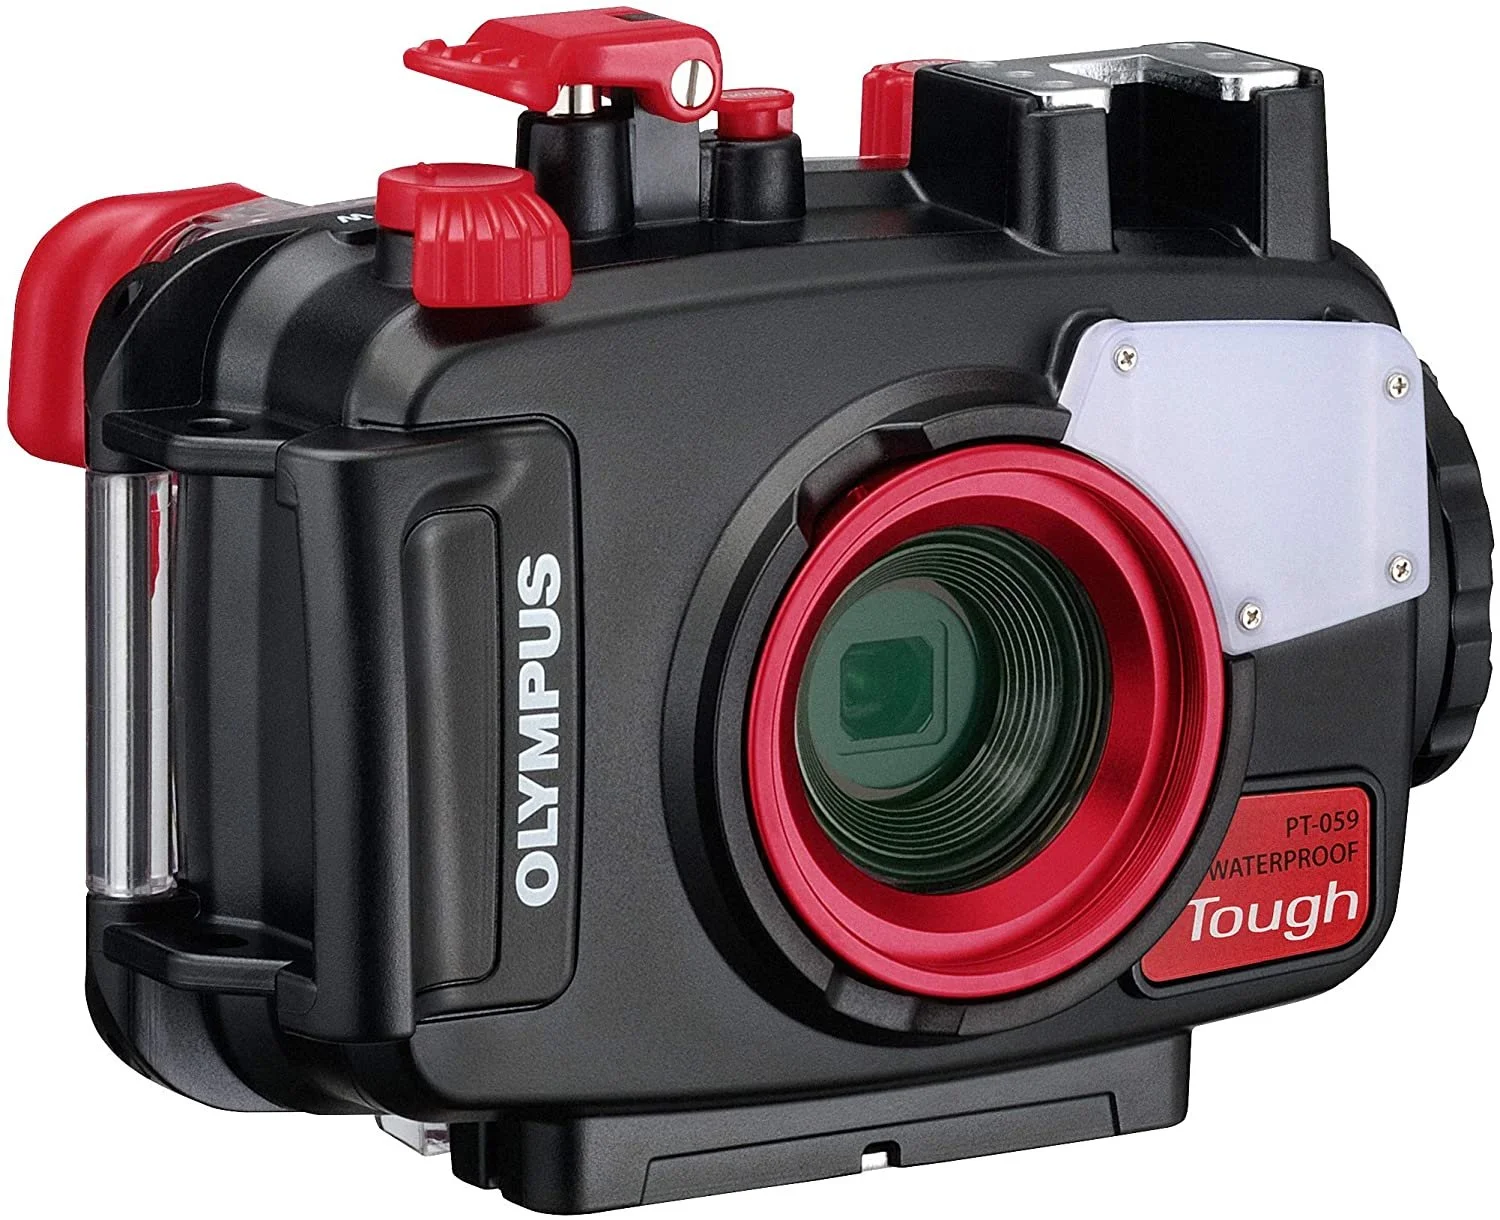
The PT-059 housing will fit the TG5, TG6 and TG7 cameras. It’s made by AOI who have produced Olympus branded underwater housings for many years along with Fantasea, Backscatter and their own brand products.
Camera
In my case I use the Olympus TG-6 camera but the OM System TG-7 is close to identical when it comes to the settings you would use. The earlier TG models can also be used to take pictures with built-in flash in their various Olympus brand housings and the TG-5 will fit the PT-059 housing if you don’t already have a housing. But some settings that give you more control over your pictures aren’t available on the TG-5 and earlier models.
Camera Settings
To give the most control over the exposure settings of the camera I opted to use the camera in Aperture priority (A) mode. This mode lets you change the f number setting to affect how much light is allowed to reach the camera sensor. It isn’t a huge amount of control with only three settings but it does help and it stops the camera changing the f number for you.
During the dive I did change the aperture setting sometimes using the dial on the camera but it also changes when you zoom the camera lens. The longer the lens is zoomed to the higher the f number is and the less light is allowed in. I often set the Aperture dial to give a lower f number when the camera lens is zoomed to compensate.
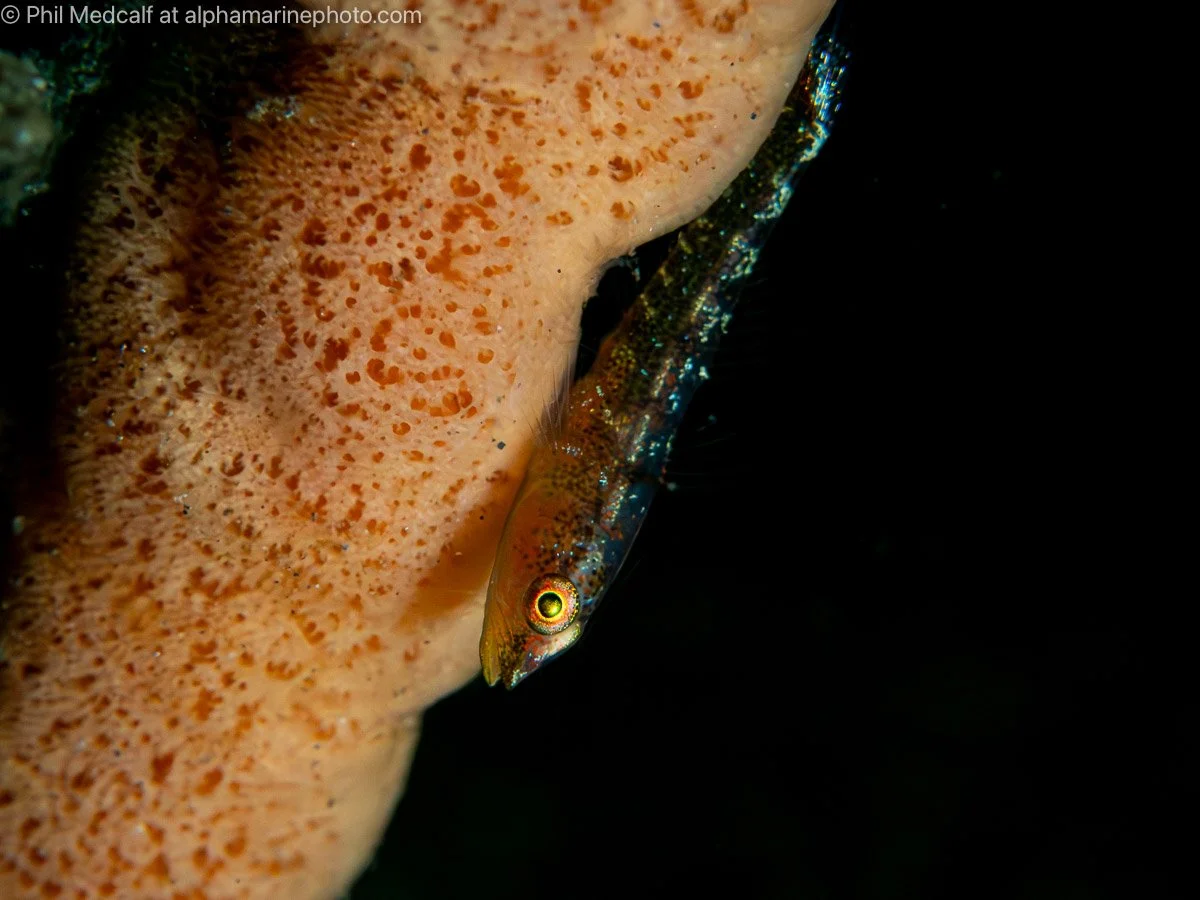
With aperture set to its highest f number and the camera lens zoomed to its longest focal length you’ll get an f number of 18. That cuts out a lot of light and along with some empty space behind your subject and a fast shutter speed to reduce the ambient light even more, will help you achieve a black background as in this shot of a goby on a sponge.
For the three dives I did using the built-in flash I used the Lowest Shutter Speed setting set to 1/500 sec and had the ISO set to Auto with a range of 100-400. These settings cut out ambient light making backgrounds darker and help give sharper images by reducing noise. Having a fast shutter speed also helps reduce motion blur in areas of the image where the flash isn’t the dominant light source. The Lowest Shutter Speed setting is only available on TG-6 and TG-7 cameras.
Because the camera flash doesn’t have a lot of power and is also very close to the camera lens you need to be close to your subject. For this reason I set the focusing on my camera to Super Macro Auto Focus. This is another setting only available on the TG-6 and TG-7 cameras and is not available in all modes.
Super Macro AF reduces focusing range of the camera to a minimum of 1cm and a maximum of 30cm. This helps with getting close to your subject because the camera just won’t focus if you are more than 30cm away. You do have to remember to keep the lens at least slightly zoomed or this setting doesn’t apply. With earlier TG’s the Microscope mode gives the same focus range.
The camera flash itself was on Manual throughout all the dives and I changed the output setting when needed to give more or less light depending on the f number being used and how bright/reflective the subject and surroundings were. At no stage did I use the flash on full power.
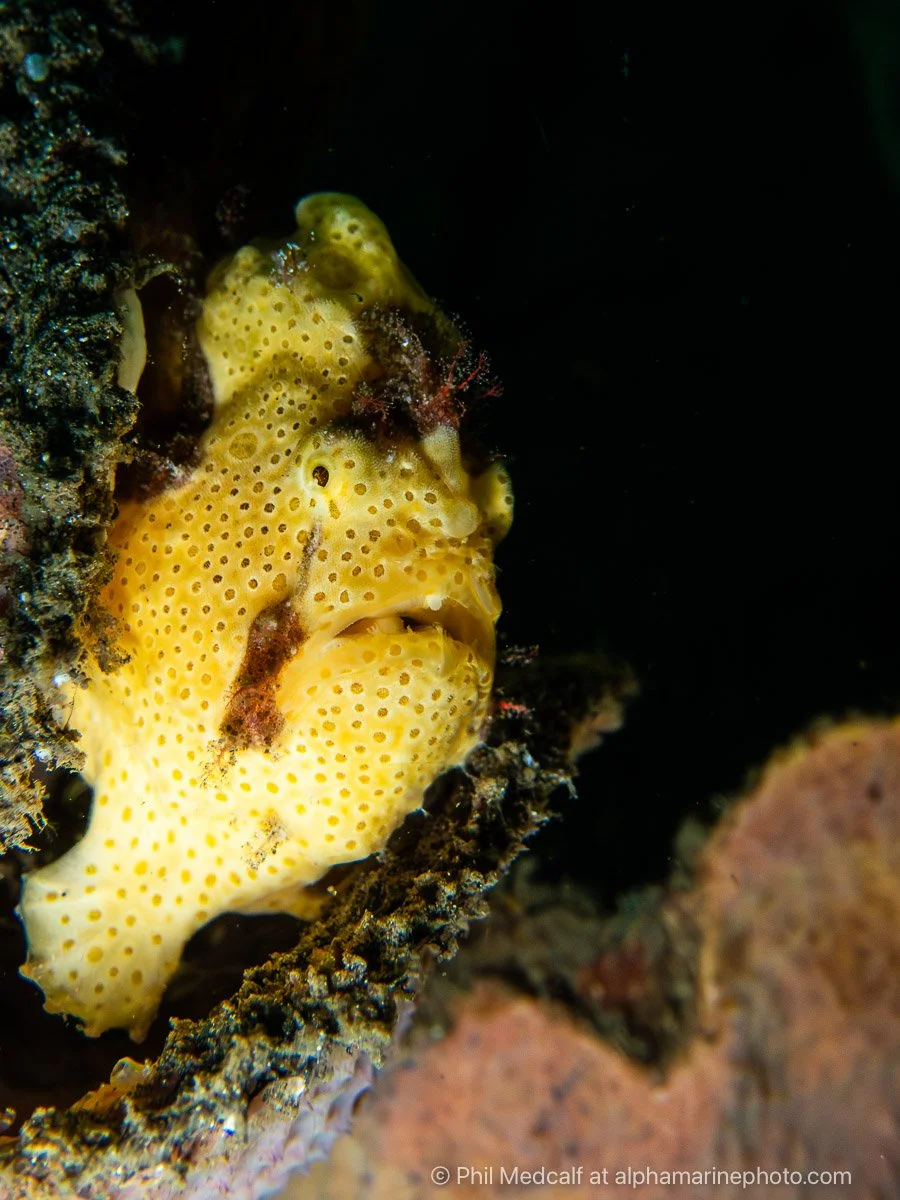
This picture of a frogfish perched on a sponge was taken with camera turned so the flash was at the bottom left lighting upwards. Aperture was set to the highest option but the lens was zoomed out to just slightly less than its widest giving an f number of 9.
Technique
As with the settings most of the technique in taking pictures using the built-in flash is about getting close. Having the small setup of just a camera in a housing helps with that. It’s easier to get the camera down low and into hard to reach positions where strobes would get caught on things or get blocked by surrounding objects. In some cases I’m not looking at the back of the camera, instead I’m judging what camera angle is needed, taking a shot, checking and then adjusting if need be. This means you can get the camera down low without disturbing the sandy seabed, damaging marine life and risking being stung by something you haven’t spotted.
You do need to have good buoyancy control and manoeuvring skills when taking pictures of creatures from such short distances. 30cm is really quite close and because of this there were some subjects that I opted not to even try and photograph whether because they were too large to fit in the frame or because they would’ve swam away if I’d got that close.
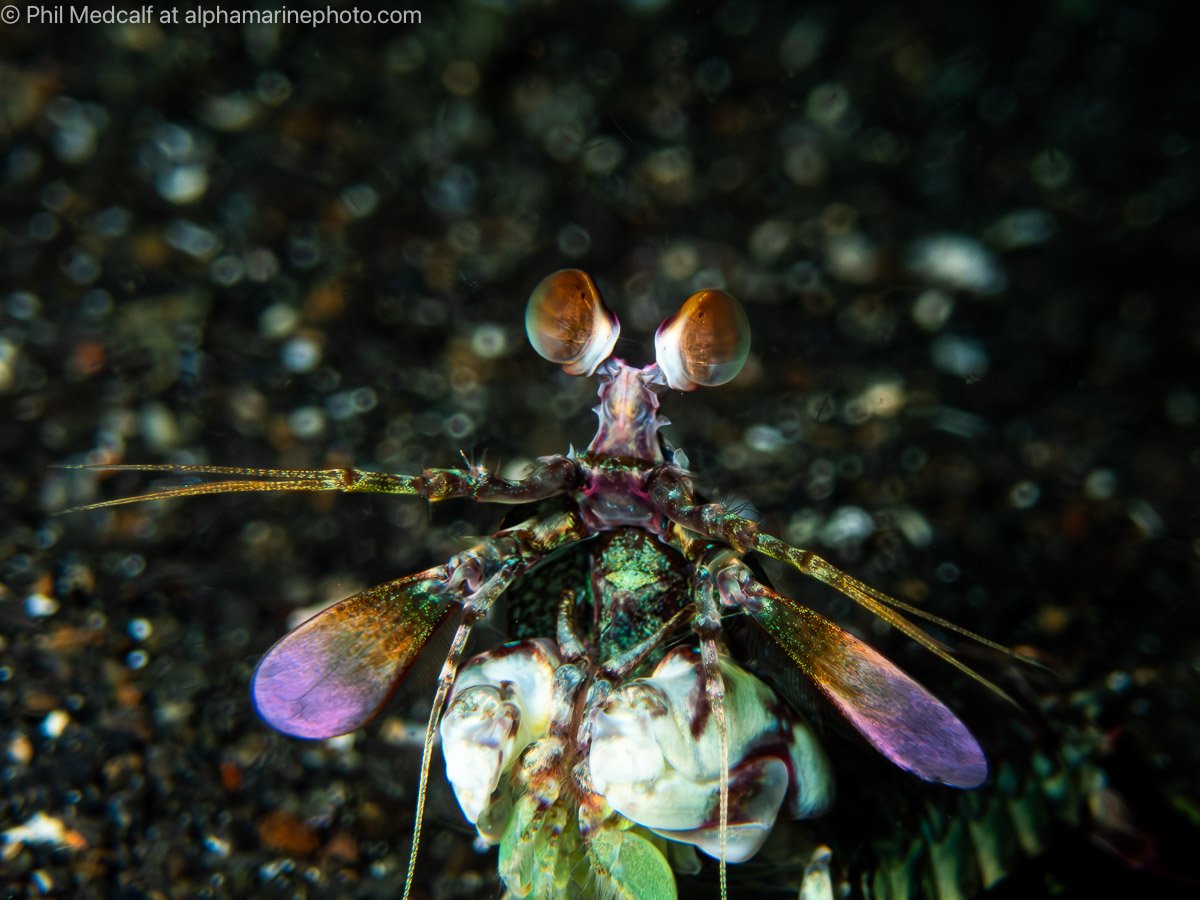
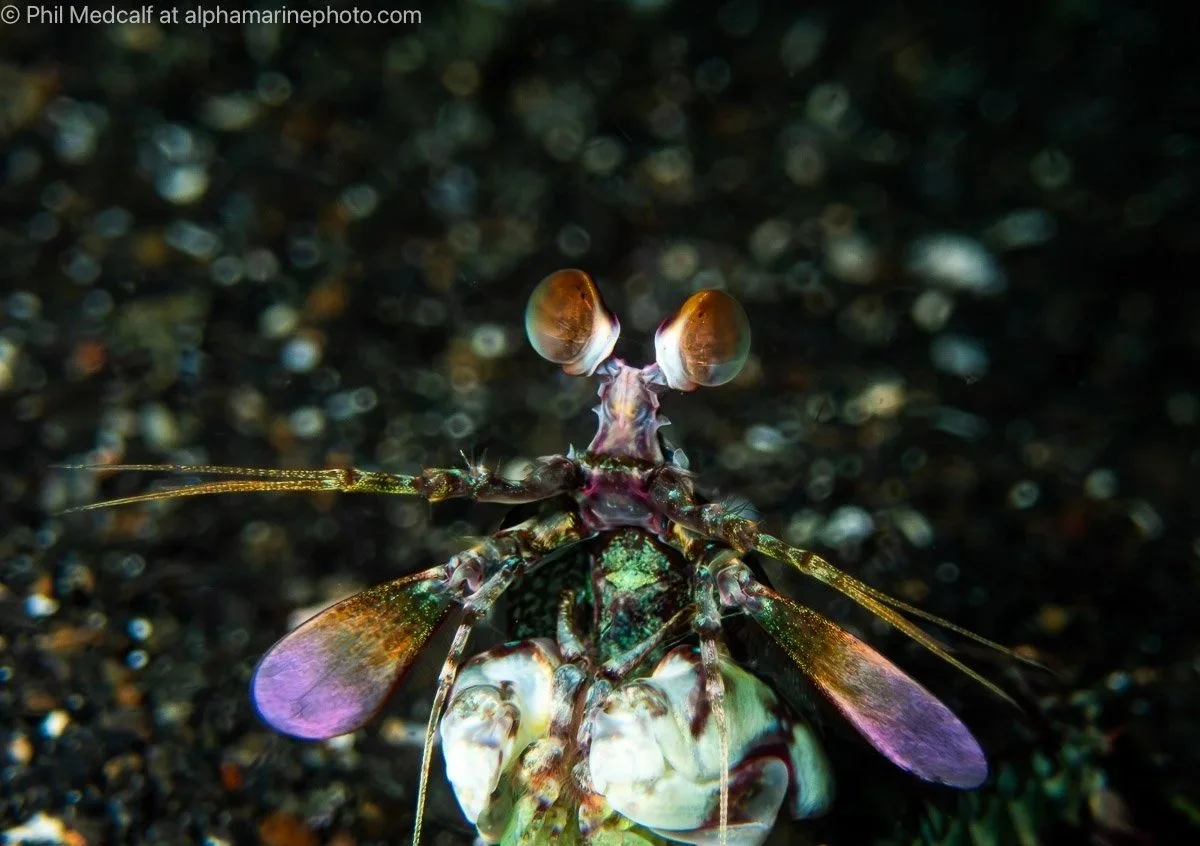
This pink eared mantis shrimp was really tolerant of me and my camera and let me keep close to it and get a series of shots. Being close to your subject reduces depth of field which is why the background will often be out of focus.
Changing the angle of the camera has a big influence on where the light falls. For instance having the camera in portrait position where the long side of the picture will be vertical will give you more even lighting because the difference in distance from the left side where the flash is to the right is less significant than when the camera is positioned for landscape style shots where the alongside is horizontal.
Editing
All the images in this blog were taken as Raw files and the processed using Adobe Lightroom Classic.
Most had some adjustment to improve contrast, vibrance and clarity to make them less flat looking. I also applied denoise to most as the small sensor in the TG6 does tend to result in noise even at fast shutter speeds and low ISO’s
I sharpened them to reduce lens blur another common TG problem using Photoshop, removed a few spots of debris in some and then cropped in some cases to improve composition.
In no case did I do more than a couple of minutes editing, but bear in mind I’m practiced at doing it.
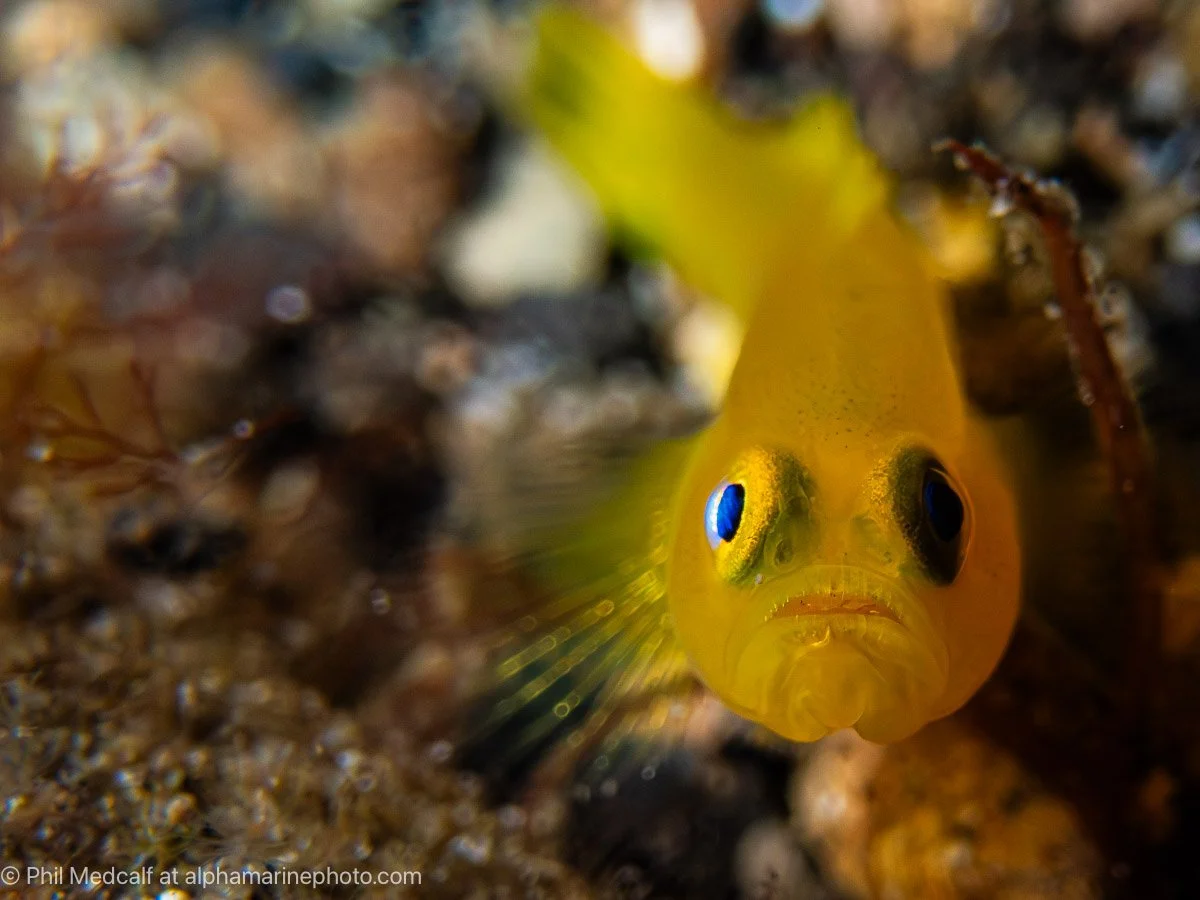
In this picture of a yellow dwarf goby, one side of the fish is in shadow because the camera is very close and the flash coming from the top left corner is blocked by the fish itself. Positioning the camera in portrait position would’ve lit the fish a bit more evenly with more shadow below rather than to the side.
Parting Shots
Hopefully you will have found this blog useful and it will inspire you to have a go at using your built-in flash either as a back to basics holiday from your strobe or video light setup or as a way of keeping things simple while you get used to your camera and housing.
It’s very tempting to build an impressive looking camera setup with strobes or lights, a tray, arms and maybe a wide angle lens straight away and as an equipment dealer I should probably encourage that for the sake of my bank balance. But you’ll be adding a lot of task load along with bulk to deal with and especially if you aren’t so experienced as a diver the hassle of using it all may actually put you off.
In my experience it’s often better to ease yourself into underwater photography doing a mix of available light photography and built-in flash stuff. Get your head around the basics and then start constructing a setup once you have more understanding of the kind of pictures you want to take.
Thanks for reading this. Get in touch if you feel I’ve missed something or have any questions.
If despite what I said you’d like to expand your underwater photography setup we are a dealer for a wide range of underwater photography brands. To order equipment, get quotes etc contact us by emailing info@alphamarinephoto.com
If you’d like to learn more about underwater photography we run courses online and workshops in the UK and overseas. Email us with any enquiries or use our contact form to get in touch and sign up to our newsletter.
We also run a Q and A group on Facebook which anyone is welcome to join if they obey the rules.
If you found this article useful, but are not planning to buy equipment from us or do a workshop you can give us your support though our ‘buy me a coffee’ page. Be aware links to Wex, MPB or eBay listings are affiliate links and we get a small percentage if you buy something through them.