

When we originally set up this blog I wrote a series under this title. Quite a lot further down the line now I thought it would be good to gather the five articles together and give them a polish with some added info.
Taking pictures and video while diving has become increasingly popular since the advent of digital cameras. But the camera market has also become more and more complex with numerous pitfalls for would be underwater photographers. I'm going to clarify a number of the factors that make some cameras better for underwater photography than others.
Custom White Balance
If you have a limited budget getting a camera that will Custom White Balance (CWB) underwater is something to prioritise. This will allow you to take pictures underwater using just the available light down to about 20 metres depth depending on conditions and get colours other than blue and green in your shots.

This shot of an anemone porcelain crab was taken in the Maldives using available light and custom white balance. The camera was a Canon S95 in a Canon housing with an INON macro wet lens. When taking macro pictures using available light you need to be especially conscious of not blocking the sun and putting your subject in shadow
You can colour correct images after you have taken them using editing software but if you don't want to do this then Custom White Balance should be near the top of the list of features to look for when buying a camera for underwater. It will allow you to get colourful images with just a camera and housing without spending any more money.
Not all cameras have this feature and some that do require you to navigate through menus each time you use it. Some cameras including most of the Canon compacts apart from the most recent allowed you to set the CWB to one button press on the camera.

Another Canon S95 shot, this time taken by Anne using an INON wide angle wet lens. Underwater remember that the sunlight has to travel from the subject to your camera as well as from the surface to the subject. The closer you are to the subject the more colourful and sharp your images will look.
Some cameras have CWB as a feature but when underwater they struggle to actually set the white balance. We found this with the early Olympus mirrorless cameras such as the EPL-3's but newer models like the OMD EM10 MkII that we use a lot seem to be much better.
Using CWB is a more precise way of dealing with colour loss than adding a filter and if you do it every time you change depth you'll get more consistent colour in your stills photography and, depending on the camera video as well.
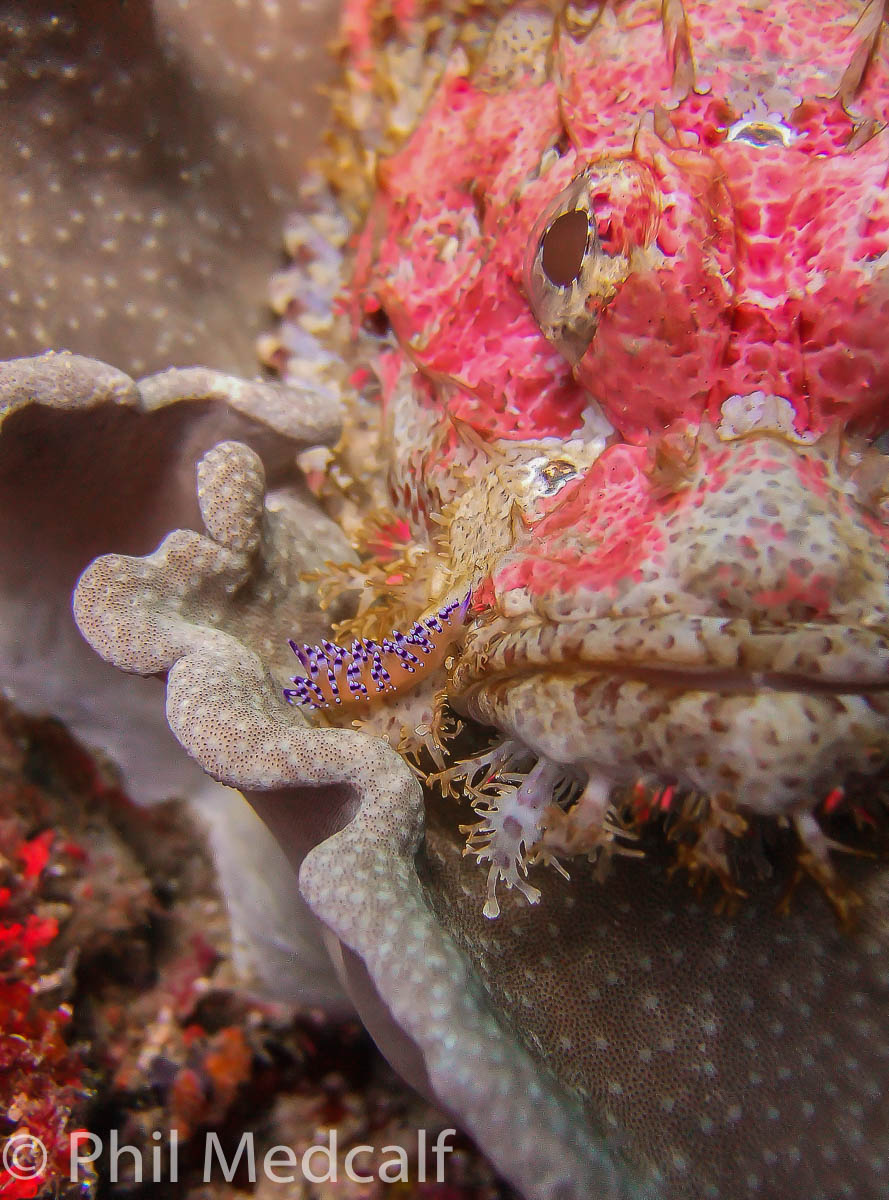
This shot of a nudibranch taking a shortcut over a scorpionfish was made using an earlier camera than the S95, a Fuji Finepix F30 which was a hugely popular compact for underwater partly because of its excellent Custom White Balance
You can use a range of neutrally coloured surfaces to white balance against, such as a diver's slate (white or preferrably grey), the grey of an aluminium cylinder, sand on the bottom or even your hand. Trial and error will show what works best for your model of camera.
Shooting RAW
I'm now going to move on to something that, at least for still photography can negate the need for Custom White Balance when shooting available light images underwater. CWB is still extremely relevant for shooting video using available light and I always teach it on our underwater photography workshops for that reason.
RAW is a format of image produced by many cameras that includes much more information than is in a JPEG. When a camera takes an image, if it is set to take JPEGs it will immediately do a basic edit of the image and compress it to JPEG form. This basic edit adds contrast, usually gives some vibrance and warmth to the colours and possibly some noise reduction. When shooting in RAW the camera leaves all the original information taken in by the sensor within the file.
What this means is that initially you get a much bigger file than a JPEG, but it gives you much more data to play with. Using RAW format allows you to recover a great deal more from your images than can be done with a JPEG. This includes allowing more colour correction than can normally be achieved and also recovering images or parts of images that have been under or over exposed.
It also means that images initially look flat and less vibrant than a JPEG and you will have to edit your images with software such as Adobe Lightroom. In addition RAW file formats are specific to camera types so when you have a new model camera you may need up to date editing software to even view them let alone edit. If you want to share your images on Facebook for example you will also have to export them as JPEGs after editing.
So here are some examples of the difference shooting in RAW can make.
Below is a shot taken using available light as it came out of the camera.

This image was taken at a shallow enough depth for there to be coloured light but the overwhelming coulours are blue and green because of the effect of the water. the ability to fix this on computer means you can simply set the camera white balance to Auto whether shooting available light or using flash. This in turn reduces your task load underwater.
And here it is after being colour corrected using Adobe Lightroom.

Because of the greater quantity of information included in a RAW file colours can be corrected more effectively than with jpegs as long as levels of coloured light are enough. A shot taken at depths where no red or yellow light reaches will look very washed out when colour corrected.
This next shot is an example of under exposure.

This image of a goby has been under exposed substantially by a combination of not enough flash and a small aperture setting.

Here’s the same picture after a minute or so’s editing, mainly adjusting the exposure.
Being able to deal with quite substantial under exposure allows photographers to use smaller apertures, faster shutter speeds or less light depending on the circumstances and still get a useable picture.
The advantages of shooting RAW also apply over exposed images.
This image of a squat lobster has been over exposed because a quite large aperture was used along with flash to light it.
Here is the same image after a minute's worth of adjustment in Adobe Lightroom

Producing this version of the image was just a matter of moving a few sliders in Adobe Lightroom, a simple process once you know how
Shooting RAW is clearly a big advantage, especially in underwater photography where lighting conditions are often difficult to control and can change quickly. But you need to take into account the increase in file size when looking at memory cards and hard drive space.
Being able to add a wide angle wet lens
When shown someone's underwater pictures and asked how to improve them the most common thing the Alphamarine team find themselves saying is 'get closer'. Reducing the distance between you and your subject means less water between the camera and what you are photographing. Because of the effect of water and the particles floating in it on light, the less between the camera sensor and the subject means clearer, crisper looking images.
What a wide angle lens allows you to do is frame the same subject in your picture but from a much shorter distance.
The images below were both taken with the same Canon Ixus camera without and then with an Inon wide angle wet lens. The framing is roughly the same but the distance to the subject when using the wide angle lens was greatly reduced.

Image by Paul Duxfield

Image by Paul Duxfield
When choosing a camera and underwater housing for it to go inside, the ability to add a wide angle lens should be high on your list of features. Not all setups are created equally. Mirrorless cameras and DSLR's have the ability to be fitted with wide angle or fisheye lenses on the camera itself and a good lens will give you startling results. When looking for a housing for one of these interchangeable lens systems you should look carefully into whether the housing system allows you to fit different ports to the housing and if so what lenses are supported by these ports.

This image was taken with an Olympus EM10 MkII camera with an 8mm Olympus fisheye lens in a Nauticam housing, the same setup as Anne is holding in the picture.
With compact cameras you are limited to using wet wide angle lenses which fit on the outside of the housing. Be aware that not all camera and housing combinations function the same when it comes to adding wide angle wet lenses. Many compact cameras, especially the higher end ones have long zoom lenses, for example the Canon G7X MkII has a 24-100mm (full frame equivalent). What this means is that to accommodate the full movement of the lens through its focal length range the port on the housing must be deep and wide. This interferes with using a wide angle lens and usually means zooming the lens in to avoid vignetting at the corners of the image. This in turn negates a lot of the advantage given by a wide angle lens.
If you have any notion of progressing in your underwater photography it's worth thinking seriously about what wide angle lens the housing and camera will support. This doesn't always come down to the most expensive being the best. For example the G9X MkII in a Fantasea housing will support a high end wide angle lens with a 67mm thread, while the more expensive G7X MkII camera needs to be placed in the more expensive Nauticam housing with a special additional Short Port in order to use the same wide angle lenses as its cheaper cousin to maximum effect.

Wide angle wet lenses are not the sole domain of compact camera users, they also perform well with interchangeable lens cameras when used with kit lenses in flat, threaded ports. The above image of a nurse shark was taken using an Olympus EPL-3 in an Olympus housing fitted with an Inon wide angle wet lens.
Having the ability to remove a wide angle lens and fit a macro lens during a dive is seen by many photographers as an advantage. It reduces the risk of infuriating moments when diving with a macro lens and you see a wide angle subject and vice-versa.

There are a number of excellent wide angle lenses currently on the market including offerings by Inon, Fantasea and Nauticam. Inon in particular specialise in making wet lenses and adapters to work with many of the branded camera housings. The image above was taken using a Canon S95 in a Canon housing fitted with an Inon lens mount and Inon wide angle wet lens.
A full manual mode
Cameras are stupid! Harsh thing to say, I know. Especially coming from someone whose business is based around cameras. But it's true, cameras are not intelligent. They struggle to make decisions on their own and they are limited as to what information they can ascertain about their surroundings. I've discussed the need to be able to white balance or shoot in RAW which comes from the inability of a camera to realise it is underwater and at a certain depth, in water of a particular tint and then automatically work out what the colours should look like. A few cameras have been produced with depth sensors but these still can’t take into account the level of particles in the water etc.

For those on a limited budget it’s often better to look for a used camera and housing than spending your funds on a new camera that doesn’t have the appropriate features. This Canon S95 in a Canon housing has all the features to be a great underwater camera and could be picked up on eBay for less than £200 if you get lucky.
The more control over the settings of your camera you have the more you can choose how your images appear. Many shots in underwater photography are unachievable with a camera set on automatic.
There are three primary settings that have a big impact on how your images appear.
Firstly ISO.
ISO in basic terms is the sensitivity of the camera. The higher the ISO is set the less light the camera needs to produce an image, but as the ISO rises quality starts to decline. Depending on the sensor size and other issues some cameras will start to get noise in their images at lower ISO's than others. Increasing ISO allows you to adjust other settings which will reduce the amount of light reaching the sensor. Many cameras allow ISO to be adjusted in most of their modes apart from Auto.
In general I seldom adjust this when underwater unless I’m using just available light and want to keep shutter speed high to take pictures of moving creatures.
Secondly Aperture.
Aperture is how wide the opening of the lens' iris is. This is denoted by an f number (actually a fraction), the lower the number the wider the aperture. Camera lenses have stated minimum and maximum apertures. The wider the aperture can be the more light can reach the sensor, but also the shallower the depth of field. Depth of field decides how much of the foreground and background in an image will be in focus. Shallow depth of field can be used to isolated the subject and is one method for dealing with unattractive backgrounds that would otherwise detract from the image.
Aperture size also has effects on images when using dome ports or domed wet lens.

In this picture a wide aperture was used to give a shallow depth of field so that not much more than the eyes of this ribbon eel are in focus.
Thirdly Shutter Speed
Shutter speed is how long the shutter is open for when an image is taken. It is measured in seconds, usually as fractions but can be set to multiple seconds or even minutes in some cases. Adjusting shutter speed affects the exposure of an image taken using available light and also whether blur occurs from movement in the image. When using flash the shutter speed can be used to control the exposure of the areas of the image not lit by the flash. Using fast shutter speeds can give dark or black backgrounds to macro shots even in shallow water during the day as can a small aperture.

This image of a scorpion fish was taken using one strobe with the cameras shutter speed as high as possible. In this case the camera was a mirrorless one and flash sync speed (the fastest shutter speed at which you can use the flash without getting shadow from the shutter curtain in your shots) was 1/160.
With compact cameras that do not have mechanical shutters like mirrorless and DSLR cameras you can set shutter speed as high as the camera will go and still be able to use the flash. This makes it easier to achieve a black background (more on flash in the next instalment).
In wide angle shooting adjusting shutter speed is a good way of controlling what is visible in the background and the shades of blue or green in the water. The light from the flash will freeze the subject but with a slow shutter speed you will still get motion blur in front of or behind the subject depending on what curtain setting you have the flash on.

In this shot of the stern of Kingston in the Egyptian Red Sea strobes were used to light the foreground while the shutter speed was adjusted to achieve the blue colour and surface effect in the water.
Hopefully you now have more idea how being able to adjust these settings yourself can improve your underwater images. Many cameras on the market that are sold with underwater housings or are waterproof don't allow you to adjust all these things independently. The very popular Olympus TG4's and 5's for example lack the ability to manually control shutter speed.
Having a flash or way to trigger a strobe
A built-in flash on your camera gives you a number of options beyond shooting available light which I discussed earlier in the blogs about Custom White Balance and shooting RAW.
The first option is to use the flash on the camera itself to illuminate your subject. Most housings for compact cameras and some housings for mirrorless cameras have windows to allow light from the flash out, they usually also come with a diffuser to soften and spread the flash light. If you are just starting out in underwater photography and don’t have much money to spend I’d recommend choosing a camera and housing that permit you to use the built-in flash.
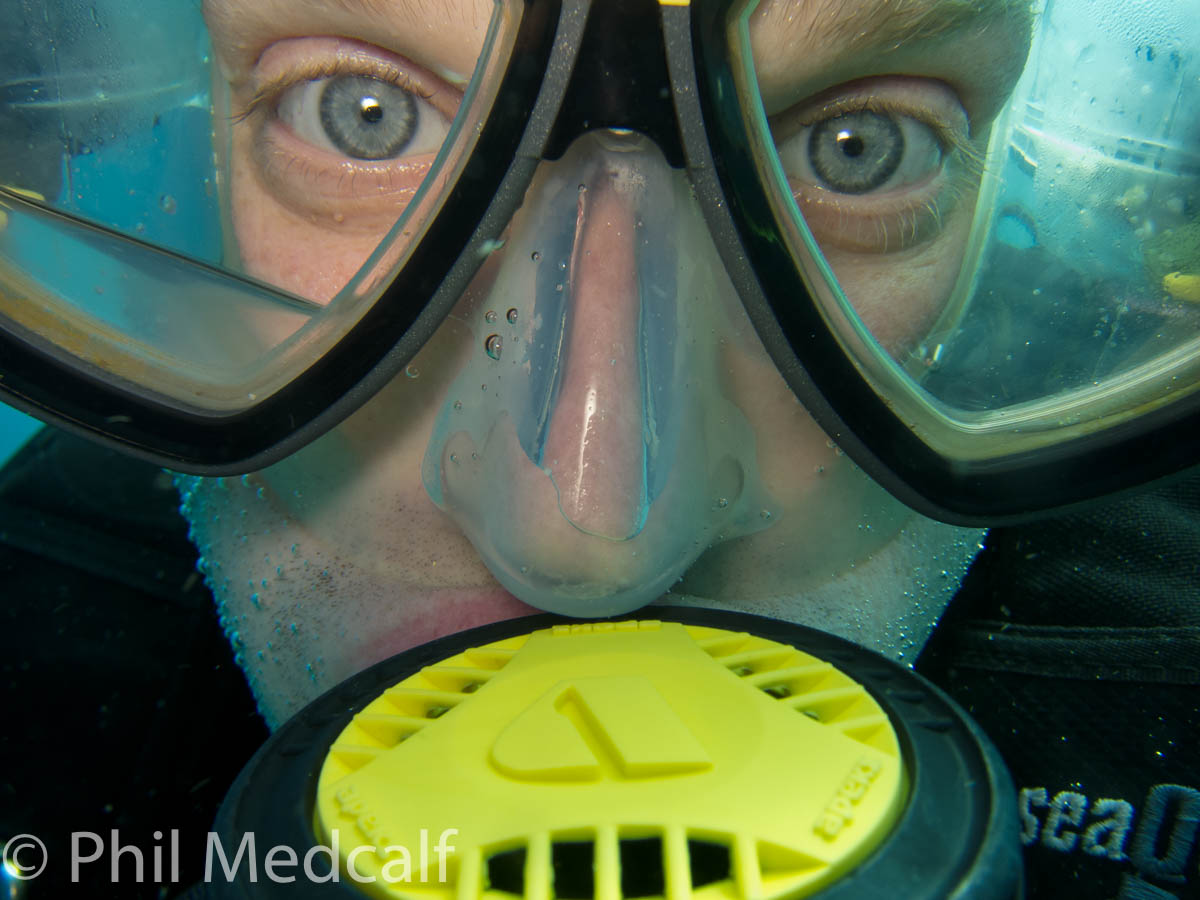
With any flash you need to be close to the subject because the water will reduce the distance the light will travel making it much less effective than it would be in air. But you don't necessarily have to be as close as this rather scary shot of me taken by Anne using the built in flash on a Canon S95 camera.
You may have to deal with shadows caused by the flash being close to the housing port. But even a small built in flash will give out more light in an instant burst than all but the most powerful video lights. It's the inability to change the position that the light comes from that puts the built in flash on a camera at a disadvantage. This said for conditions where available light isn't good enough to get the shot it's worth having a try with the built in flash if that is all you have to work with.
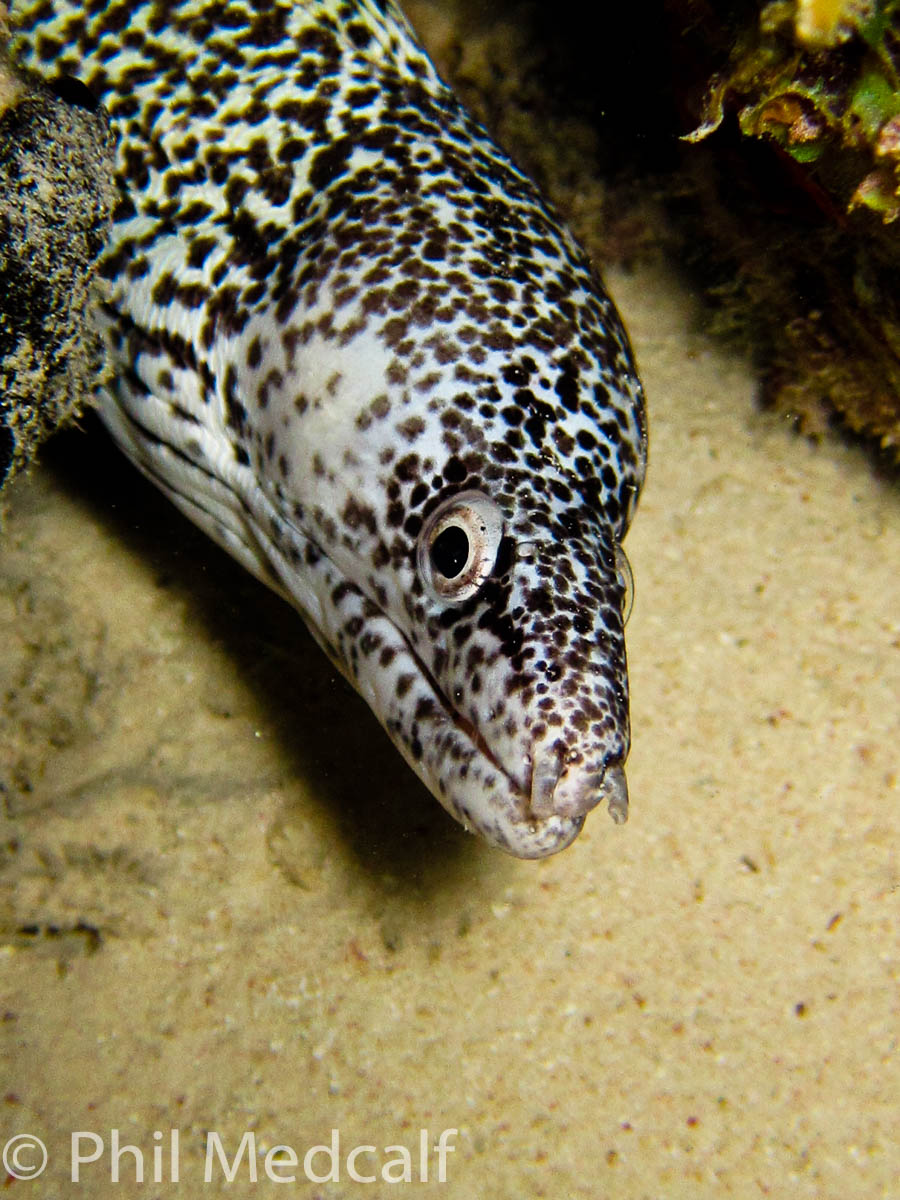
A useful tip is that you'll get more even lighting of your subject shooting portrait with the flash at the top than when shooting landscape. That’s how I took this image of a Spotted Moray in Bonaire, again using the Canon S95 in a Canon underwater housing.
The second option puts a camera with a built-in flash or hot shoe even further ahead of the action cameras. That's in allowing you to trigger a strobe.
Before we go further let's clarify this. A strobe is the name given by underwater photographers to a separate flash designed for underwater photography.

This is an INON S2000 strobe. It’s small, not overly expensive, has manual control and quite a lot of power for its size.
Having a strobe when combined with an good arm system to mount it on gives you a positionable light source that has more coverage and power than a built-in flash. This instant burst of light allows you to illuminate the foreground of your images while using your shutter speed to control the lighting of the background in your image.

This shot was taken in the Egyptian Red Sea using a pair of strobes.
If you use video lights you have to use your camera settings to control the exposure of the whole image which means that ISO's are often raised, shutter speeds slower and apertures wider. This contributes to why images taken with video lights rarely appear as sharp and crisp as those taken with strobes.
A pair of strobes isn't necessary for all types of underwater photography. You can get good results using a single strobe especially in macro photography where itgives a lot of scope for different techniques.

This is image was taken using a single strobe fitted with a snoot.
Strobes can be triggered in a number of ways. The most popular now is using a fibre optic cable to carry the light from a cameras flash to the sensor on the strobe. With cameras that have a hotshoe either instead of or as well as a built in flash, electronic cable connection can be used. This does limit which strobes can be used and means that a connection has to run through a port on the housing but means that you don't have to use battery power firing a flash to trigger a strobe. It is now possible to buy strobe triggers that connect to the camera hotshoe and produce a flash of light by LED to allow fibre optic cables to be used without a built in flash.
The Icing on the Cake
The above five features are what I would call the essentials when looking for a camera to do creative underwater photography and have plenty of scope to develop (sorry for the pun).
Once you’ve fulfilled these requirements there are other factors that come into play.
Cost is considerable factor, with some cameras and housings giving much more bang for your buck than others.
If you are keen on video as well as stills some cameras will come out ahead for having features like 4K and shooting the equivalent of RAW in video.
Sensor size is certainly a factor and I’ll likely look at it in more detail down the line but for now bear in mind that a large sensor is not always entirely a benefit. Some large sensor compact cameras suffer from having large lenses that make it difficult to get housings that support wet lenses.
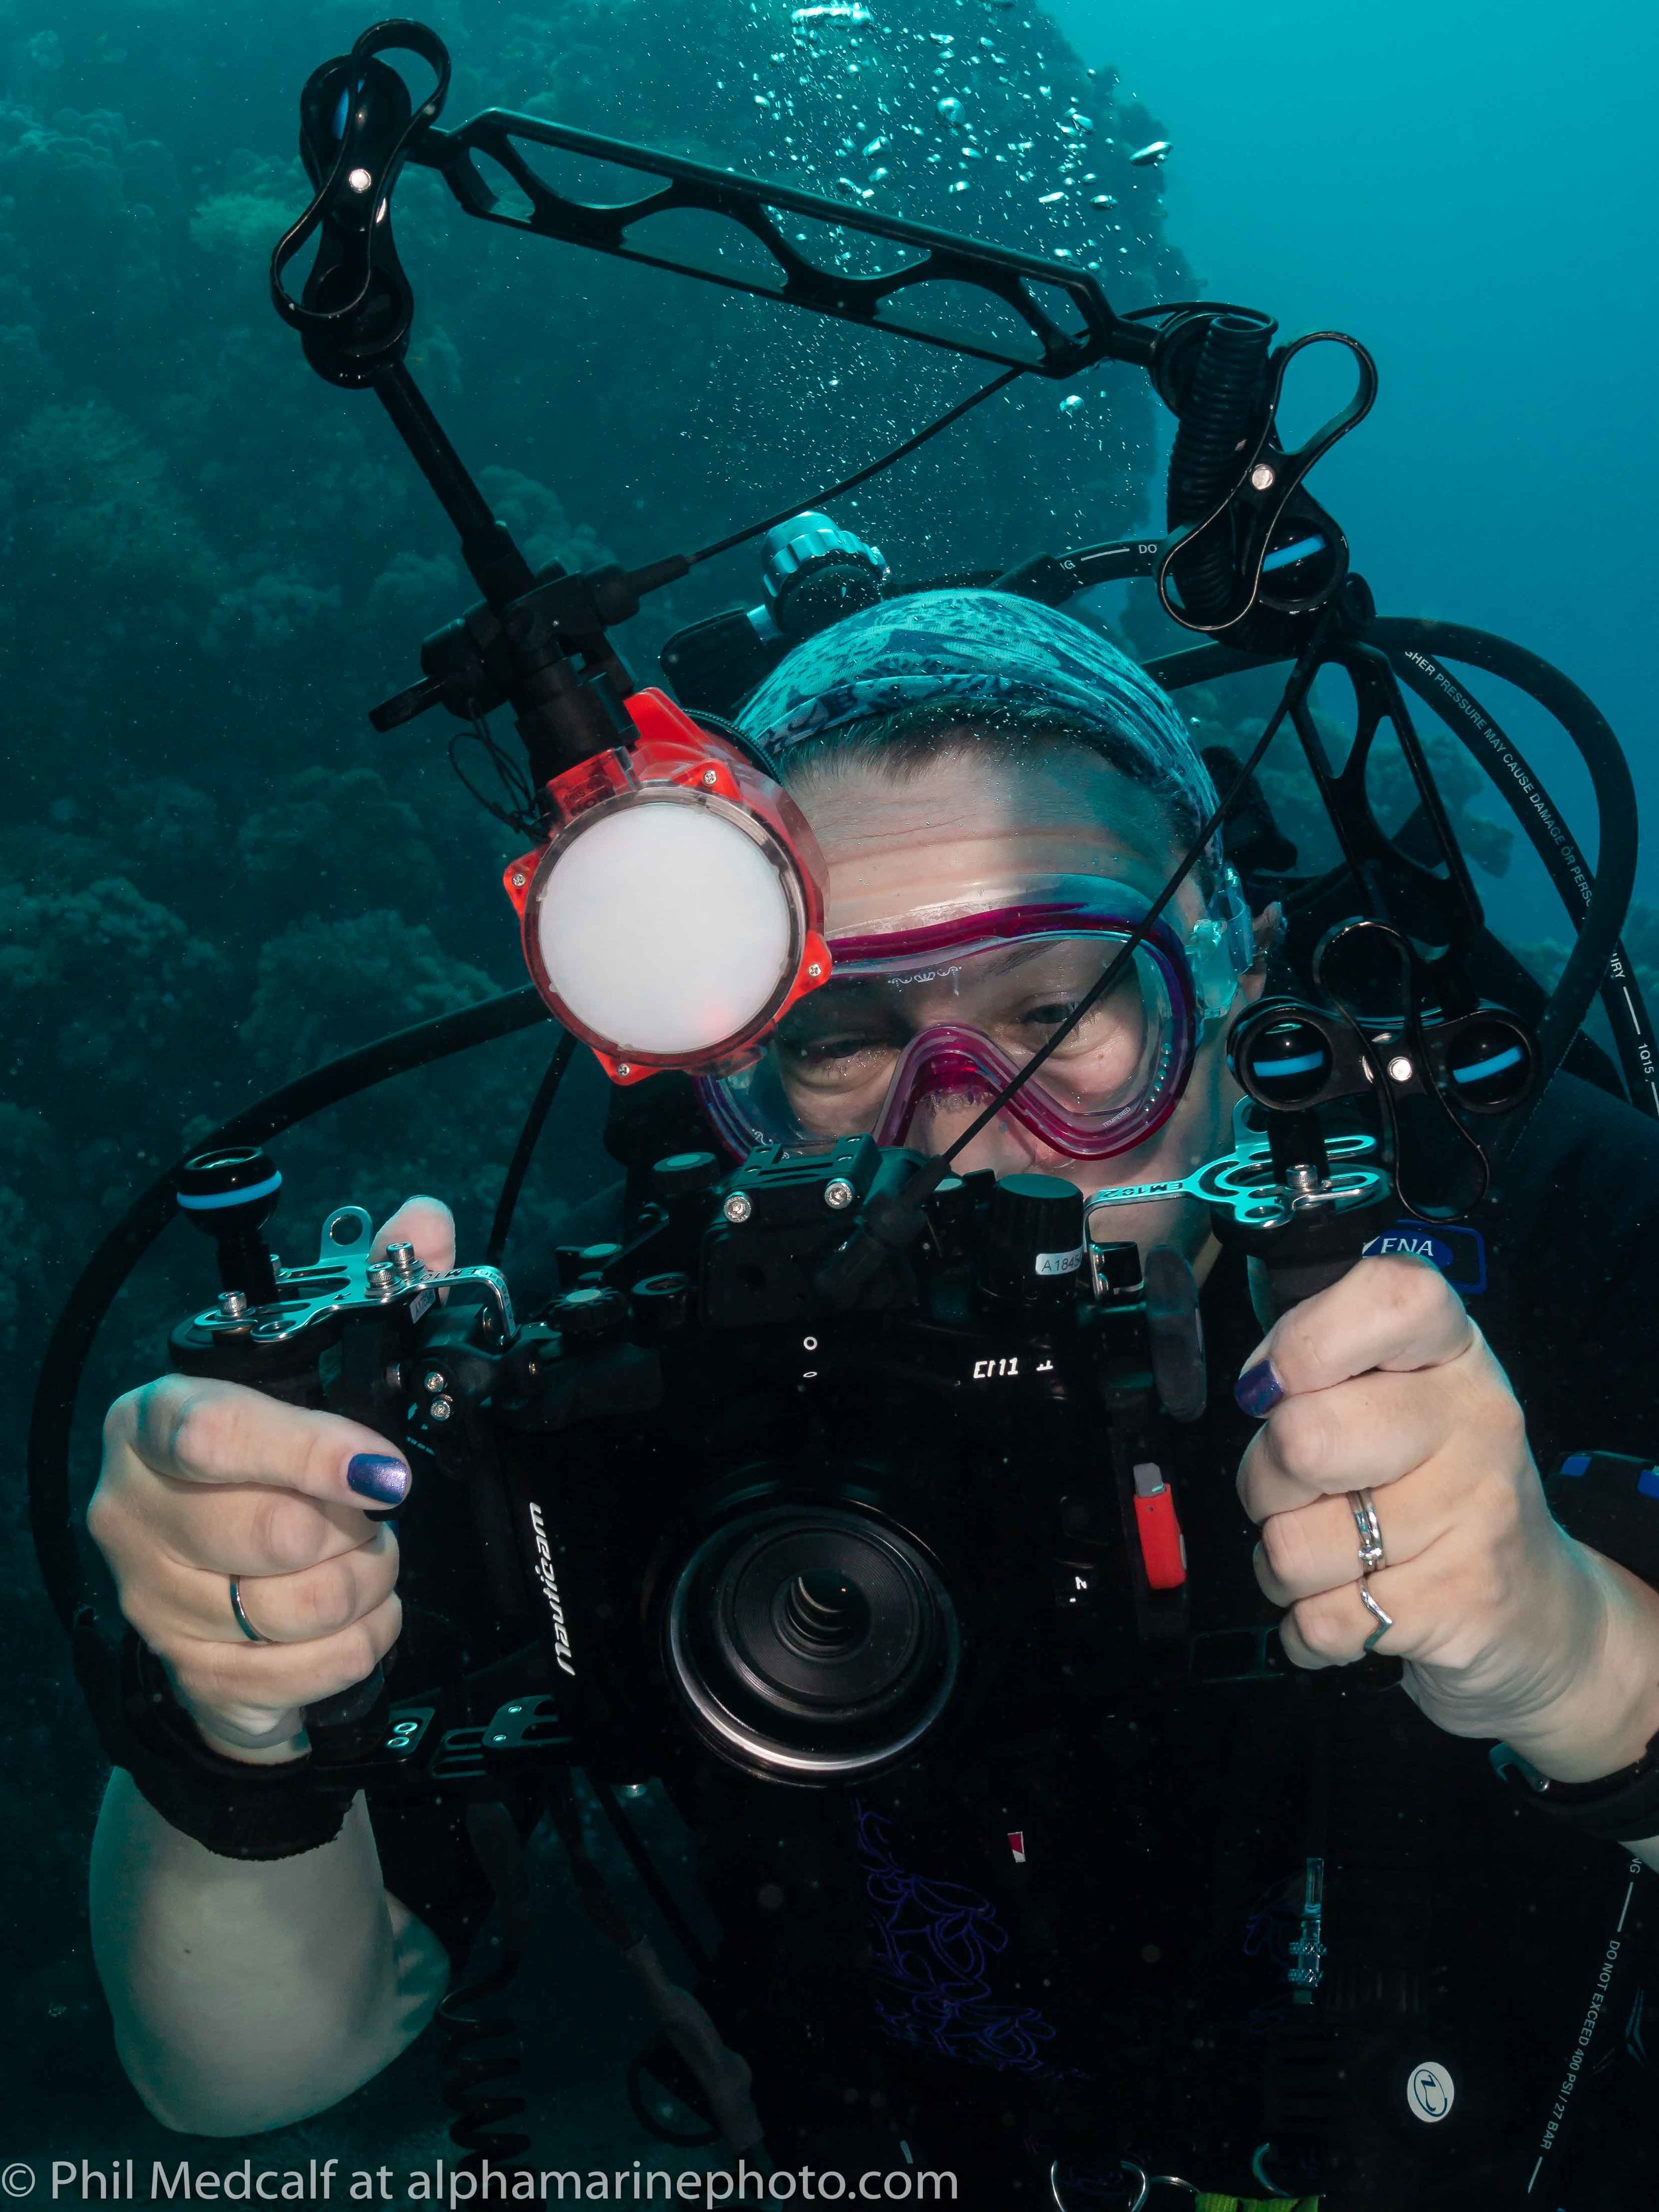
The Olympus Micro Four-Thirds mirrorless cameras like the OMD EM10 MkII that Anne is using in a Nauticam housing here, really hit the sweet spot of a sensor that is large enough to give good dynamic range but small enough that the housing required isn’t huge and very expensive.
Simple things like comfort of holding the housing and ease of using the instructions and menus can be deciders for many people. Get the wrong combination of housing and camera and you’ll find underwater photography a tedious and unpleasant waste of your diving.
If you are in doubt as to what camera and housing to go for whether new or used get in touch via the comments on here or our email info@alphamarinephoto.com and/or join our Facebook Q and A group.
We are a dealer of a number of brands of housing but we will only sell products we would be happy to use ourselves and our main goal is to get people taking pictures underwater whether with a brand new multi thousand pound rig or a used camera and housing bought off eBay for a £100. It really doesn’t matter to us.
We are also offer online courses in underwater photography for specific types of camera and run workshops in the UK and overseas.
If you found this blog useful you can support what I do by donating via Buy Me A Coffee.
We are now affiliated to Wex Photo and Video. Clicking on links and buying something will help to fund this blog and the other things we do.