

Cameras are stupid! Harsh thing to say, I know. Especially coming from someone whose business is based around cameras. But it's true, cameras are not intelligent. They struggle to make decisions on their own and they are limited as to what information they can ascertain about their surroundings. I've discussed the need to be able to white balance or shoot in RAW which comes from the inability of a camera to realise it is underwater and at a certain depth, in water of a particular tint and then automatically work out what the colours should look like.

Anne diving in the UK with a Canon S95 compact in a Canon housing. This is quite an old camera now but working ones with housings still turn up on the used market and with a full manual mode and RAW capability they are a good starting point for a would-be underwater photographer on a small budget
The more control over the settings of your camera you have, the more you can choose how your images appear. Many shots in underwater photography are unachievable with a camera set to automatic.
There are three primary settings that have a big impact on how your images appear. These are what make up the so called ‘exposure triangle’.
ISO
ISO in basic terms is the light sensitivity of the camera. The higher the ISO is set to the less light the camera needs to produce an image, but as the ISO rises image quality starts to decline. Depending on the sensor size and design some cameras will start to get noise in their images at lower ISO's than others. Increasing ISO allows you to adjust other settings which will reduce the amount of light reaching the sensor. Many cameras allow ISO to be adjusted in most of their modes apart from Auto.
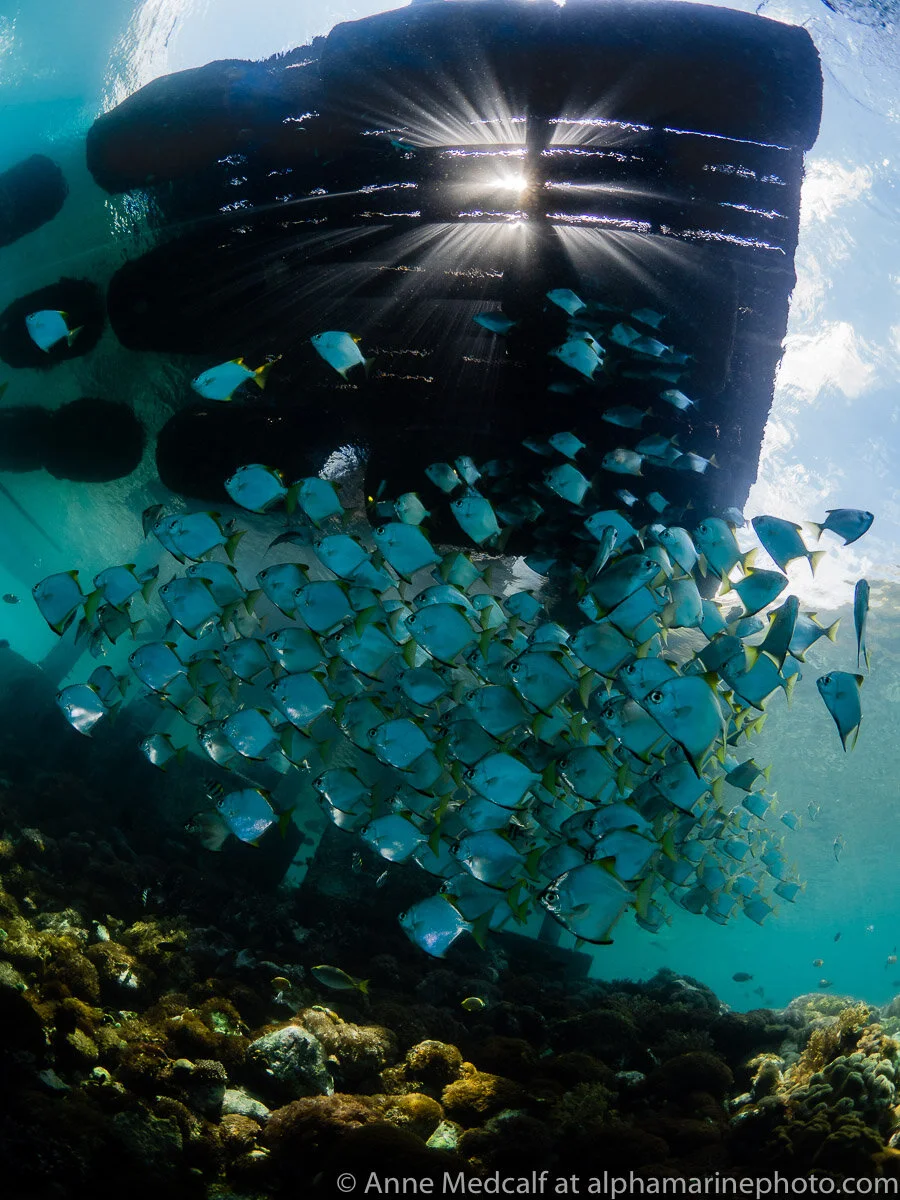
For this image of fish under the jetty at Alami Alor resort in Indonesia, Anne used a slightly higher than normal ISO of 320 (ISO 100 or 200 is considered best for image quality depending on the camera). This along with a wide aperture let her keep the shutter speed a bit faster than would otherwise have been possible and this helped to freeze the movement of the fish and sunbeams in this available light shot.
Aperture
Aperture is how wide the opening of the lens' iris is. This is denoted by an f number, the lower the number the wider the aperture. Camera lenses have stated minimum and maximum apertures. The wider the aperture can be the more light can reach the sensor, but also the shallower the depth of field. Depth of field decides how much of the foreground and background in an image will be in focus. Shallow depth of field can be used to isolated the subject and is one method for dealing with unattractive backgrounds that would otherwise detract from the image.

In this picture, a wide aperture was used to give a shallow depth of field so that not much more than the eyes of this male ribbon eel are in focus.
Cameras keep the lens’ aperture open to its widest until the moment a picture is taken. This helps the camera focus quickly and is why lenses with large maximum apertures are often call ‘fast lenses’. But this does mean that on the screen or through the viewfinder you may not see quite what the final image will look like when it comes to depth of field. Because of this many cameras incorporate a depth of field preview button or the option to set one up.
Shutter Speed
Shutter speed is how long the shutter is open for when an image is taken. It is measured in seconds, usually as fractions but can be set to multiple seconds or even minutes in some cases. Adjusting shutter speed affects the exposure of an image taken using constant light either natural or artificial and also whether blur occurs from movement in the image. When using flash the shutter speed can be used to control the exposure of the areas of the image not lit by the flash. Using fast shutter speeds can give dark or black backgrounds to macro shots even in shallow water during the day.

This image of a scorpion fish was taken using one strobe with the cameras shutter speed as high as possible. In this case the camera was a mirrorless one and flash sync speed (the fastest shutter speed at which you can use the flash without getting shadow from the shutter curtain in your shots) was 1/160.
With compact cameras that do not have shutters with so called ‘curtains’ like mirrorless and DSLR cameras you can set shutter speed as high as the camera will go and still be able to use the flash. This makes it easier to achieve a black background (more on flash in the next instalment).
In wide angle shooting adjusting shutter speed is a good way of controlling what is visible in the background and the shades of blue or green in the water. The light from the flash will freeze the subject but with a slow shutter speed you will still get motion blur in front of or behind the subject depending on what curtain setting you have the flash on and how or if you move the camera while taking the show.

In this image of a diver at the stern of the Kingston in the Red Sea strobes were used to light the foreground while the shutter speed was adjusted to achieve the blue colour and surface effect in the water.
Hopefully you now have more idea how being able to adjust these settings yourself can improve your underwater images. Many cameras on the market that are sold with underwater housings or are waterproof don't allow you to adjust all these things independently. The very popular Olympus Tough TG’s for example lack the ability to manually control shutter speed.

All the settings discussed in this blog can be used in land photography as well and I suggest you get in the habit of using your camera on manual even when not in the water. To achieve this image of a lion taken on a dull South African winter's morning I raised ISO to 2000 to allow me to keep shutter speed high while using a camera with a long lens hand held.
If you'd like advice, are interesting in buying underwater photography equipment or booking on one of our in person workshops or live online courses get in touch via our email info@alphamarinephoto.com. You can also buy recorded online course access via this website.
You are welcome join our Q and A group on Facebook. Please read the rules before posting or commenting.
If you found this blog useful and would like to support us you can ‘buy me a coffee’.
Be aware links to Wex, MPB or eBay listings are affiliate links and we get a small percentage if you buy something through them.