
How negatively buoyant your underwater camera setup is can have a big impact on your comfort level when using it and to some degree the quality of the images or video you are producing.
In this blog I’m going to look at how the buoyancy of your setup can cause problems, how to get an idea of how negatively buoyant your camera rig is and the various equipment options available to add buoyancy.
Should Your Underwater Camera SeTUP be Negative, Positive or Neutrally Buoyant?
The answer to this first question depends on how you are using your camera and the type of diving you are doing.
From my experience if you are a scuba diver you don’t want a positively buoyant camera setup. If you hold a buoyant setup in front of you the effect on your diving trim is to tilt you head up. Your feet will be lower and this means you’re more likely to kick the seabed, causing damage and reducing visibility. Finning in that position will naturally push you upwards. You’ll also find the effort of keeping level against the buoyancy will give you back ache.
I have seen some folk suggest on Facebook that a positively buoyant camera is less likely to be lost if you let go of it. While that might be true if you are at the surface, at depth if you let go of your camera and it floats upwards by the time you safely reach the surface it’s likely to have drifted and be very hard to find unless you are in confined water.
Because of these factors I’d recommend having your camera setup negative or close to neutrally buoyant. You can adjust your diving trim to allow for a negatively buoyant camera rig so you stay level or slightly head down when using it. I took this approach for many years.

Large dome ports can add a lot of buoyancy to an underwater camera setup and you may need to take that into account if changing from shooting macro with a flat port and dense wet lenses to wide angle with a dome. Dome ports can also cause a tendency for the front of the housing to lift up and this can get uncomfortable on your wrists during long dives. Some manufacturers make counter weight fittings for their housings.
For still photography a negative setup doesn’t stop you getting good pictures but when shooting video you’ll find that a camera setup that constantly wants to go downwards can make for more camera shake and less watchable footage.
Dropping a negatively buoyant camera rig when it isn’t attached to you will be a disaster if you are diving over deep water where you can’t safely go after it. For shallow water diving that’s not an issue although you don’t want your equipment or marine life to suffer ‘impact trauma’, as a result of you losing your grip.
Having your equipment neutral or close to gives you three benefits. Steadier video footage with less effort, generally less arm fatigue from holding your rig, as I’ve got older I’ve found that more of an issue and if you do let go of your equipment it won’t drop away from you quickly.
For snorkelers who are staying at the surface a buoyant camera rig isn’t a problem. For free divers on the other hand you may prefer to keep your setup as negative as possible and put it on a buoy between dives. Buoyancy floats will increase the amount of drag through the water and give you more workload.

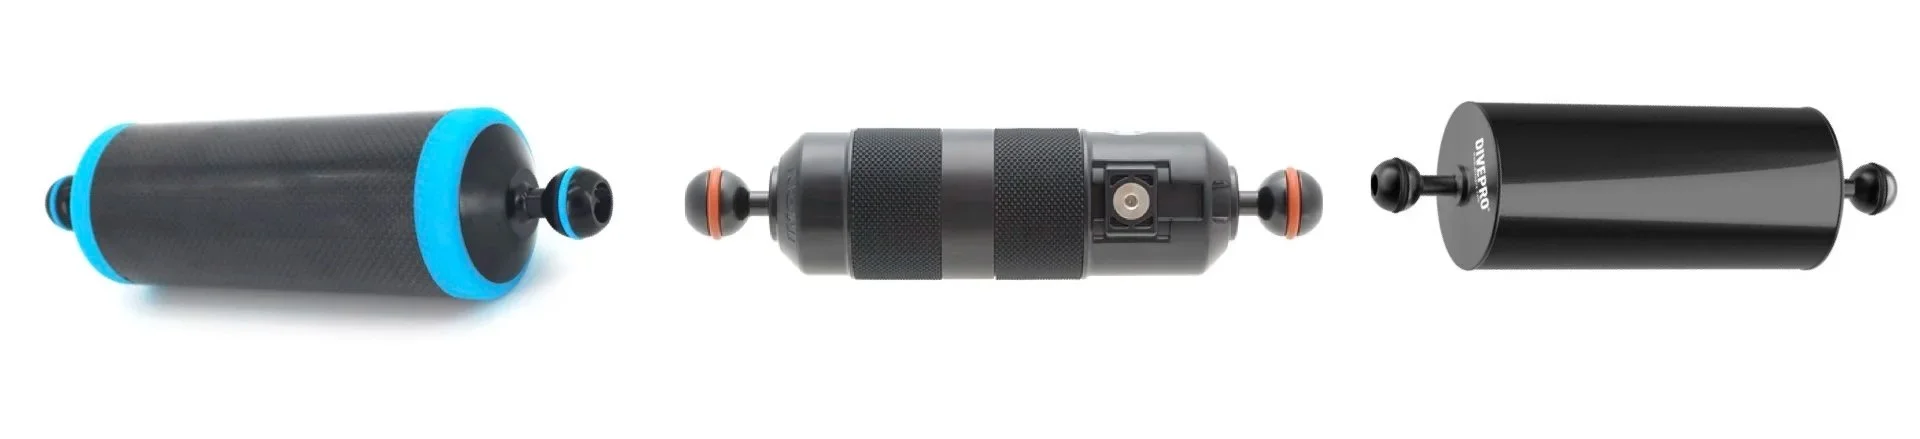
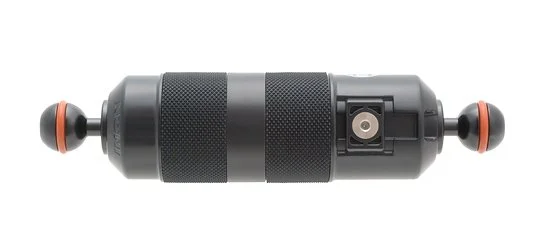
For free divers wanting to keep the drag generated by their camera setup to an absolute minimum, stick arms like these made by INON are a good option for use with strobes or video lights.
How Negative Will Your underwater camera rig Be?
You may be able to get quite exact figures for how negatively buoyant your equipment is from the manufacturer’s website or the user manuals. But that does vary from company to company. INON have a detailed section of their website listing the underwater weights of their current range along with many discontinued products. You can get figures for even the smallest and lightest of objects such as strobe diffusers.
Other brands are more hit and miss, and when it comes to housings for interchangeable lens cameras you may find that you can’t get figures for individual lens and port combinations.
Numbers when they are provided will usually be for buoyancy in fresh water. Because camera equipment is relatively small you’ll find there isn’t a huge difference in buoyancy when diving in salt water. I would suggest erring on the side of being somewhat negative in freshwater so you don’t end up with a positive rig when diving in the sea.
To get precise figures you can measure your setup’s buoyancy yourself using an accurate luggage or fishing scale. You’ll want something that measures down to 10g increments. Fill a bucket or tub with water and suspend your equipment from the scale. The weight shown when the setup is completely immersed, not touching the sides or bottom of the tub will be how negative it is. You could do this in one go for your entire rig if you have a big enough bucket or weigh parts individually and calculate a total.
How negatively buoyant your camera setup is depends on all its component parts. Without any floats this setup will be quite negative because of the arms, tray and aluminium Nauticam housing with a flat port while the strobe, an INON S2000 only adds about 70g of negative buoyancy
Buoyancy Arms
There are a number of solutions when it comes to reducing how negative your setup is. The commonest choice is to use strobe arms that provide buoyancy. Several manufacturers of underwater photography gear make good ranges of these.
The larger diameter a float arm the more buoyancy it will add but that does make for more bulk and increase drag through the water. You may also find that it’s harder to adjust your strobe position when using large float arms.
When using a lighting setup with two lengths of strobe arm and three clamps, where you place float arms will depend on the type of strobe or light you are using and your personal needs. With a heavy strobe or light it’s generally best to place the float arm closest to the light source to counteract the weight on the arm setup.
With lighter strobes you may find having a large float attached makes it less likely to hold position unless you tighten the clamps up. In addition when shooting macro it can be problematic getting the strobe in close to the camera if you have a bulky float arm attached. In that situation you may find placing the float nearest the housing a better option or using a pair of narrower diameter float arms to give similar buoyancy rather than one large float and a normal lattice strobe arm.
You may find with large diameter float arms that you need to use a long clamp between the pair of arms to prevent the clamp handle getting caught against the body of the float.
Another option I have seen used sometimes is to place a triple clamp on each handle of a dual handle tray and then put a float arm between them. This can limit the range of movement available for your strobe arms at the handle but can help with keeping the arms attached to your strobe less bulky and in adding extra buoyancy when a setup is particularly negative.
NAUTICAM FLOAT ARMS
Nauticam offer their float arms made from carbon fibre and aluminium in three different diameters and a range of lengths.
Nauticam float arms are rated to a depth of 100m and have a life-time warranty.
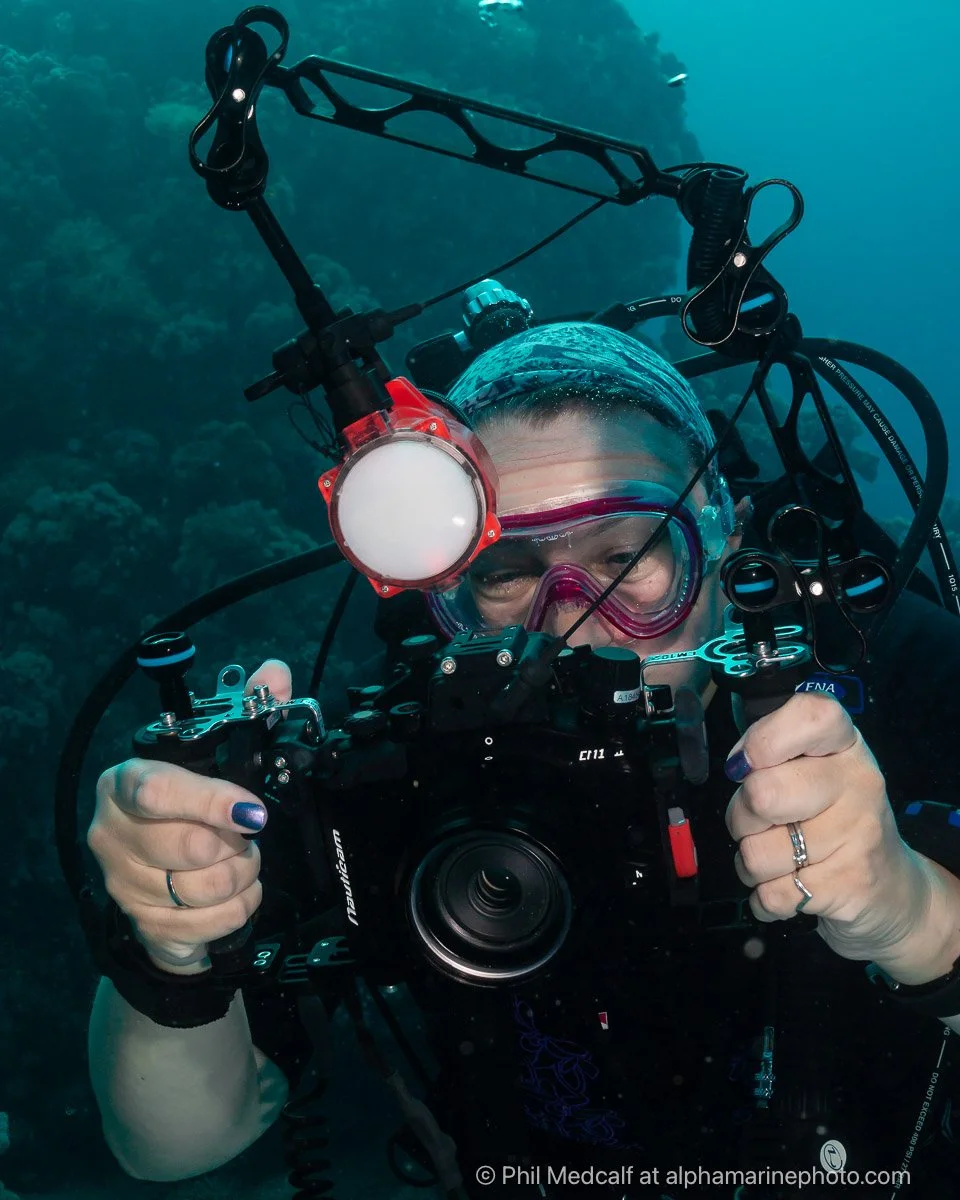
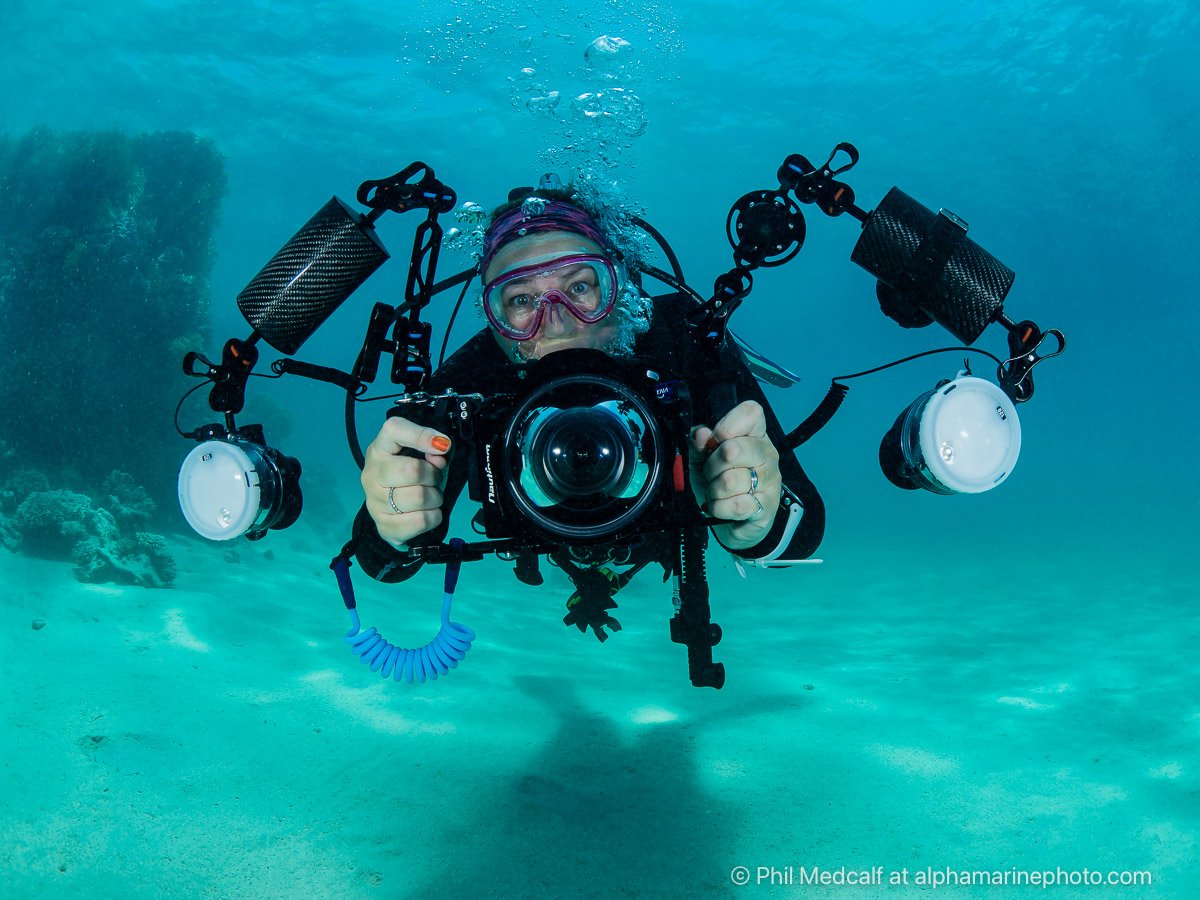
In this image Anne is using a pair of 200mm by 70mm Nauticam Float arms which give a total of 740g lift. She has Nauticam Long Clamps between the float arm and the lattice arm on each side to reduce the possibility of the clamp handle catching against the float.
The narrowest arms are 50mm diameter and are available in three lengths. The 200mm gives 160g buoyancy and costs £116, 250mm is £123 and gives 240g buoyancy and the 300mm is £137 and gives 320g.
70mm diameter arms have the same lengths. A 200mm gives 370g buoyancy for £137, 250mm gives 520g for £173 and the 300mm gives 670g for £210.
The largest diameter Nauticam float arms are 90mm and are either 170mm long with 450g buoyancy for £181 or 220mm with 720g buoyancy for £217.
Nauticam do make specific lens holders to fit onto their 70mm and 90mm float arms.
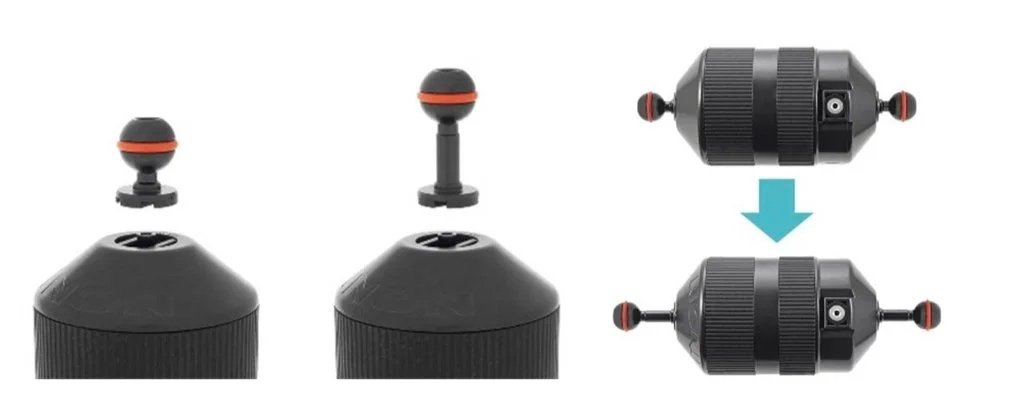
Nauticam have also recently released a Float Stick as an accessory for their Insta360 X5 action camera housing. This is made from the same materials as their float arms, is 350mm long and has a 37mm diameter. It gives 190g buoyancy and can be fitted with a range of screws for attachment to other housings. It can also be fitted to a tripod and there will be a hand strap for it in the future to help keep it secure when you using it with just the X5 housing.
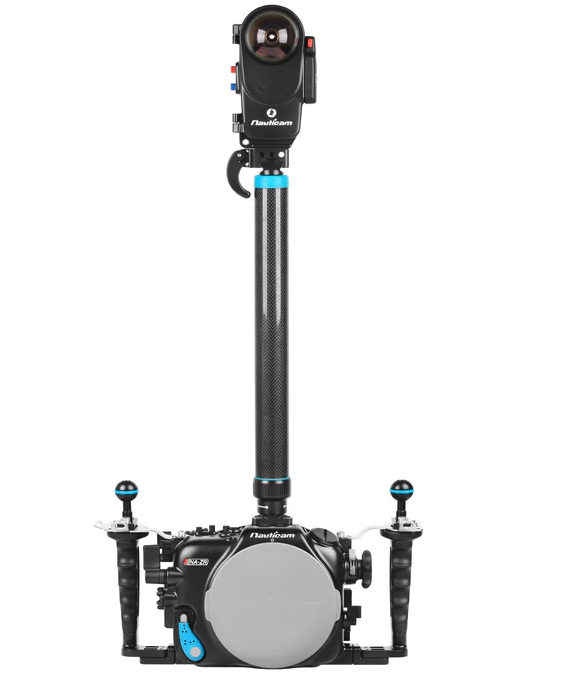
While the Float Stick for the Nauticam Insta360 X5 housing adds 190g of lift, according to Nauticam’s stats the housing is 470g negative with the camera and battery installed. so you if you do add this to your camera setup you may well want to add some more buoyancy to your lighting arms as well.
INON FLOAT ARMS
INON float arms are made from ABS resin combined with aluminium ball mounts, depth rated to 70m and available in 50mm and 95mm diameters.
The 50mm arms are the 150mm Float Arm S for £38 giving 75g buoyancy, the 200mm Float Arm M for £42 with a buoyancy of 135g and the 260mm Float Arm ML for £51 with 210g buoyancy.
INON float arms like this Float Arm M, all have attachment points on them for fitting wet lens holders. they also have bands of high grip surface to make holding them in gloves easier.
INON has this month released new versions of their large diameter Mega Float arms. The old versions were the Mega Float Arm S with a length of 150mm giving 390g buoyancy and the Mega Float Arm M with a 200mm length and 650g buoyancy.
The new versions are the 90 Mega Float Arm 160 which replaces the Mega Float Arm S and gives extra buoyancy for an increase of length to 160mm. Buoyancy is now 437g for a cost of £40. The 90 Mega Float Arm 208 replaces the Mega Float Arm M and gives 694g for an increased length of 208mm and a cost of £43.
The new INON Mega float arms have the added feature of being able to change the ball mounts for ones with longer stems. This reduces the likelihood of the handles on your arm clamps getting stuck against the floats without the need for using long clamps. It also gives you the ability to customise your arm lengths. Each ball mount costs £10 and has an increased length of 20mm. Adding a pair will increase your arm length by 40mm.
DIVEPRO FLOAT ARMS
DivePro’s float arms are available in 60mm and 80mm diameters.
60mm arm lengths available are 200mm for £59.95 giving 230g buoyancy, 250mm for £79.96 giving 330g lift and 500mm for £199.96 which don’t have a lift amount specified for them but I’d expect it to be about 600g.
80mm Divepro arms are available as 200mm for £84.95 giving 400g lift and 250mm for £109.96 with 600g lift. There are also 375mm for £169.96 and 500mm for £229.96. Again there aren’t any lift figures for the long ones but I’d expect the 500mm to give over a 1000g of lift.
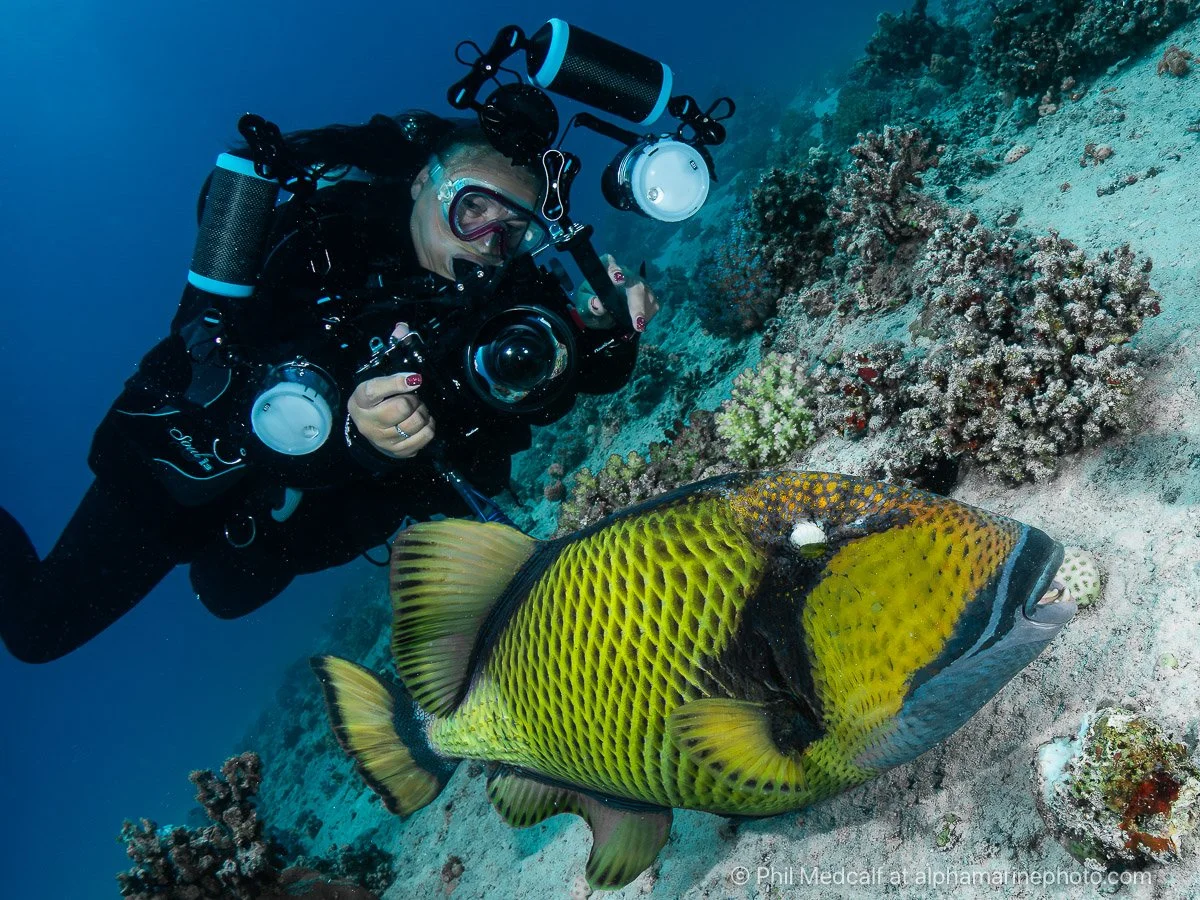
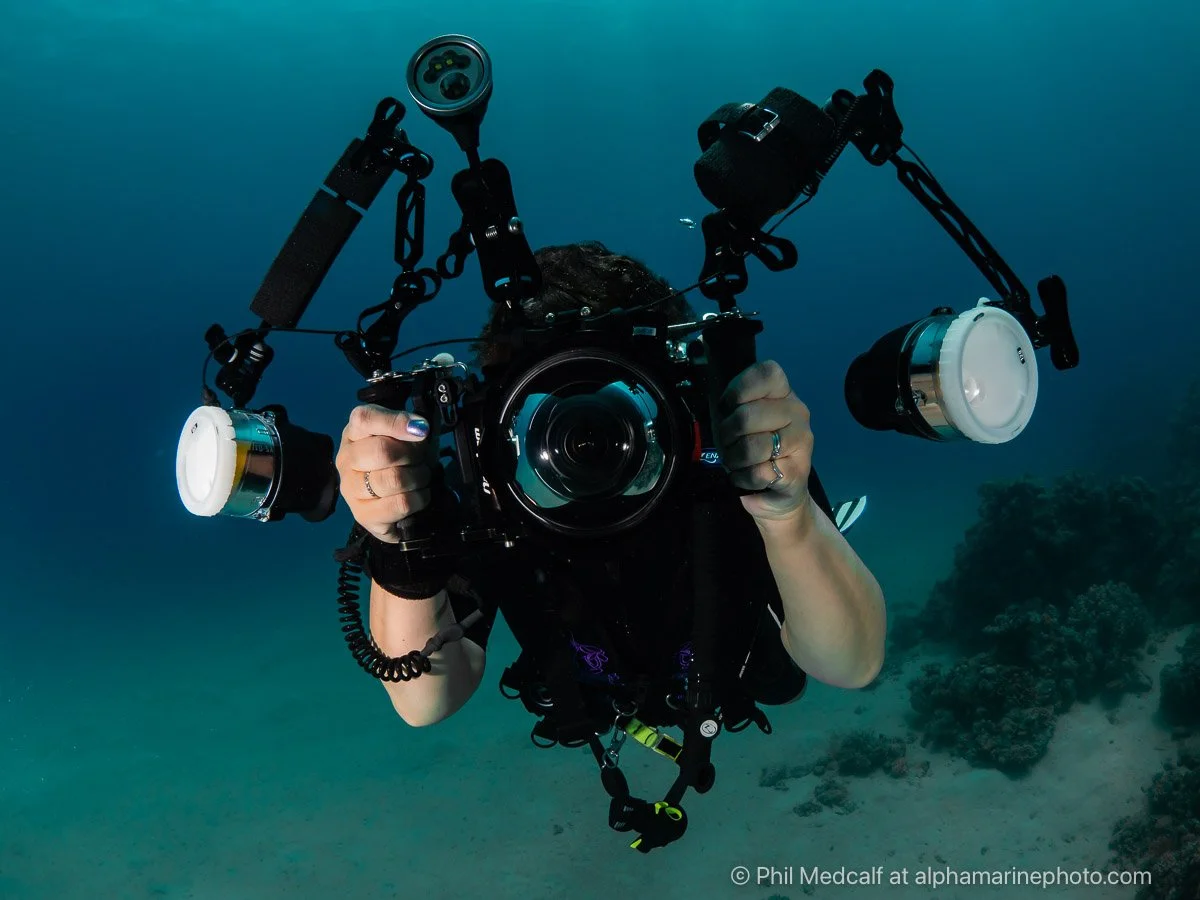
Anne using an early pair of DivePro float arms. Unfortunately the early design arms had an issue with the ends becoming unscrewed. This has been corrected in later versions but this can be an issue with cheaper brand arms.
Stix Adjustable Float Arms
StiX are better known for their separate floats made to fit over various types of strobe arms and around housing ports but they also make a number of arms which come with floats included.
The float parts are made from closed cell rigid foam.
They offer a 6”/150mm arm with two of their jumbo floats fitted which gives 250g buoyancy for £72.
A 9”/225mm arm with three and a half large floats fitted which gives about 300g lift for £72
And a 15”/375mm arm with six small floats that gives 145g lift for £75.
It’s possible to take off the ball ends from these arms and remove floats or change them for different sizes to tune your buoyancy.
You can also buy a 9”/225mm without any floats included for £45.
It’s not always essential to exactly match floats on both sides of a two strobe camera setup. In this picture there’s a 9” StiX float arm on one side and a 6” on the other giving a total of 550g lift.
FLOATS FOR STROBE ARMS AND HOUSINGS
StiX Floats
StiX floats are probably the most popular solution to adding buoyancy that we sell.
Two sizes of floats are available to fit lattice style arms such as those made by Nauticam, INON, Deepshots or Ultralight.
Both sizes come in packs of four and each float is about 2”/50mm long but with different diameters. The floats are the same material as those on the StiX Float Arms.
The Large floats cost £38.50 and give about 95g of lift each for a total of around 380g.
The Jumbo floats are £52 and give about 190g lift each for a total of roughly 770g. These are about 50mm in diameter.
The holes through the floats are off centre rather than dead centre which means you can position your arms in such a way that the handles of your clamps have more room to be moved and are less likely to get caught.
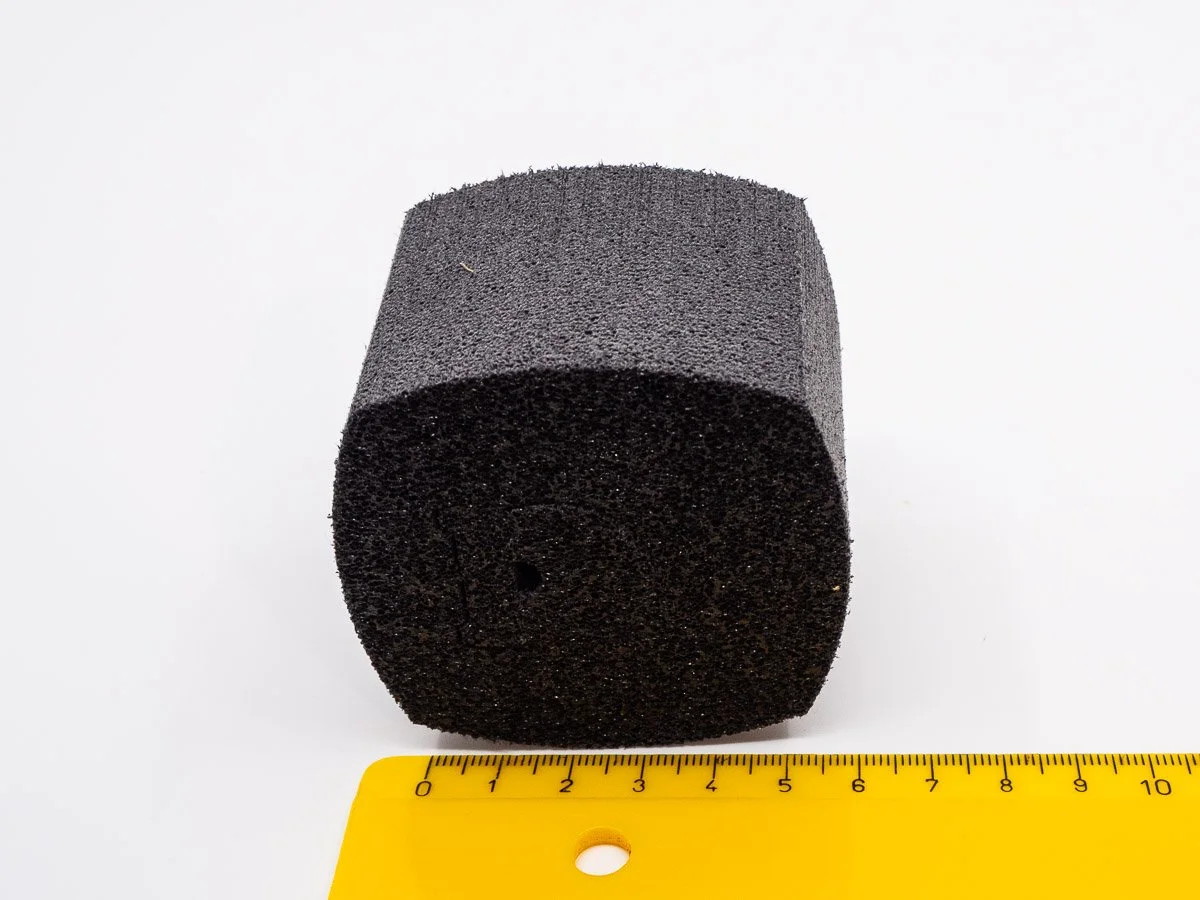
StiX floats can be sawn up to tune their buoyancy more precisely. Being made from foam they do lose some buoyancy as you get close to their recommended max depth of 40m.
StiX also produce the FB-12 Float Belt (£64.80) to fit around macro ports for underwater camera housings. This gives a whopping 1000g of buoyancy but you need a port with enough space to fit the 55mm thick floats around it.
The float belt has 12 segments and from what I can tell it is possible to remove some to adjust it.
For someone using a heavy wet lens like the Nauticam SMC-2 this might be a good option.
Kraken Floats
Kraken makes three sizes of high-density foam float to fit over lattice strobe arms. I haven’t found information about depth rating for these floats but I’d expect them to be similar to the StiX floats.
The FB05 is £14, has a 60mm diameter and is 65mm long. It gives 125g of lift.
The FB06 is £18.99 has an 80mm diameter and is 65mm long. It gives 240g of lift
The FB07 is £24 is 90mm in diameter and gives 315g lift.
Floats for LIGHTs and Lenses
Floats for Keldan Lights
Keldan produce buoyancy rings to fit their 18X/24X (£95 each) and 8X/8M (£96) video lights.
A single ring brings the negative buoyancy of an 18X light to 280g and 24X to 370g. Fitting two improves that to 60g for an 18X and 150g for the 24X. For the 8X a single ring makes it 180g negative, two will bring that to 50g and a single ring makes the 8M neutrally buoyant.
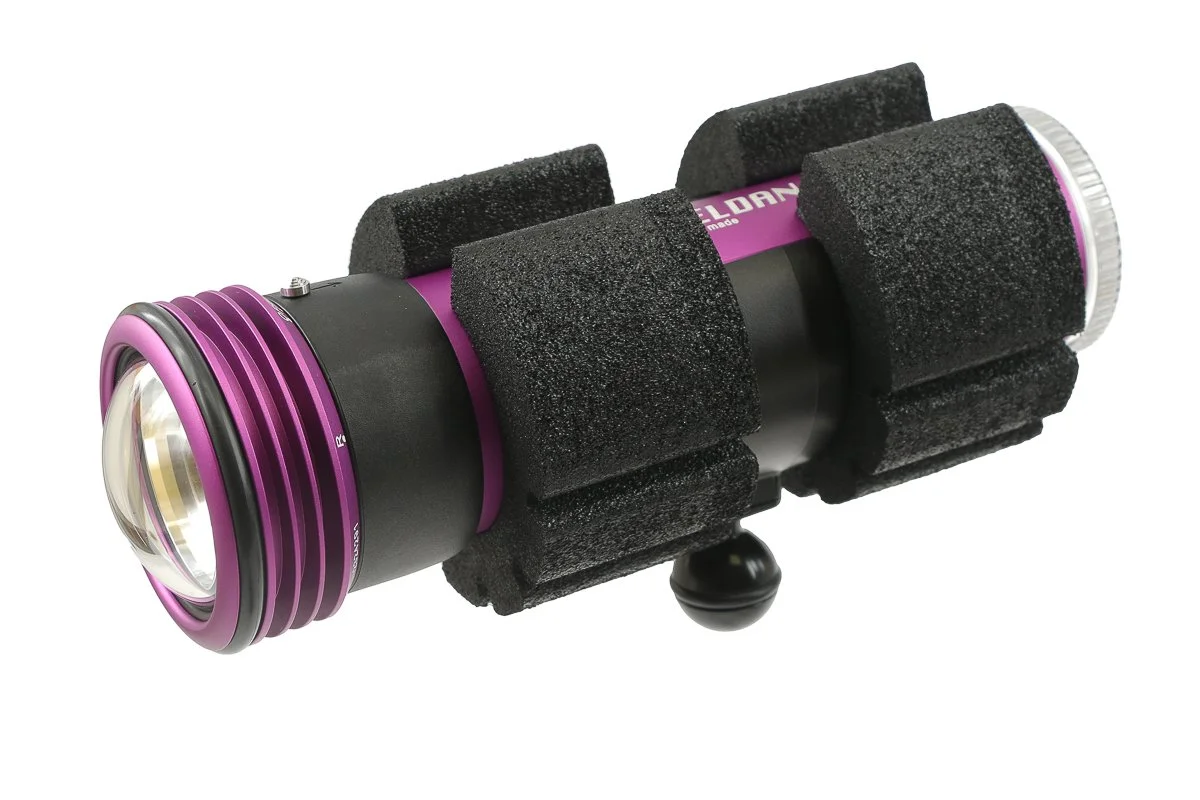
The long body of Keldan lights give room for two of their float rings to be added.
There are also foam clamps that combine buoyancy with a ball mount for attaching the light to an arm setup. Those are available for the 18X/24X, 8X/8M and the 4X.
The 18/24 float clamp reduces the negative buoyancy on either light to about 300g. The 8 clamp gets the 8X to 140g and makes the 8M neutral and the 4 clamp reduces the 4X to 110g negative.
All the Keldan floats are rated to 180m depth.
Floats for Kraken Lights
Kraken do have a number of floats for their video lights on their website but as yet our UK supplier isn’t stocking them.
Floats for Nauticam Lenses
Nauticam wide angle wet lenses and wide angle conversion ports (WACPs) have floatation rings built into them to counteract some of their weight. The MWL-1 can be fitted with a float collar sold as a separate part for £462 which reduces how negative the lens is to 60g.
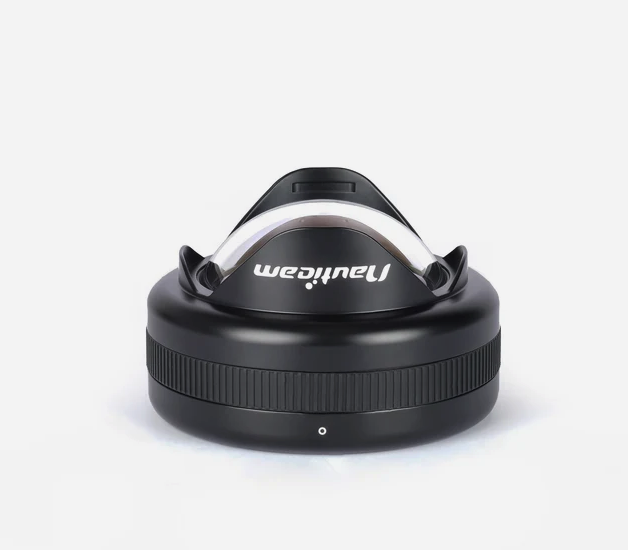
Because its larger size gives more space for a built-in aluminium float collar, this Nauticam WWL-1B is actually less negative than the smaller WWL-C which weighs less in air.
Floats for AOI/Fantasea Lenses
AOI produce a float collar to git UWL-09 and UWL-09 Pro wide angle wet lenses made by them and sold under their brand and branded as Fantasea.
The float collar costs £39 and according to the stats will make a UWL-09 slightly buoyant (60g) and reduce how negative the glass domed UWL-09Pro is to 270g from a very weighty 770g.
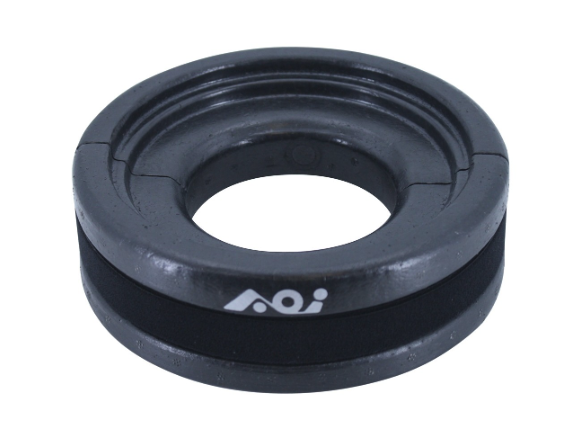
The polystyrene AOI FC-01 float collar for the UWL-09 lenses is a low cost way to significantly reduce how negative your setup will be when using those lenses. The original Nauticam WWL-1 came with a similar style collar included.
Trim Weights for Housings and dome ports
AOI’s BYR-01 Buoyancy Regulator for Dome Ports is designed to be fixed to the shade of a dome port and allows the buoyancy of the port to be counteracted by adding weights to the attached compartment.
At £125 it isn’t cheap but it does fill a role that other manufacturers of underwater photography equipment don’t seem to have produced as finessed a solution for. I’ve seen a couple of solutions to trimming for dome ports that used projecting bars designed to have a lead weight strapped to, which certainly weren’t as neat.
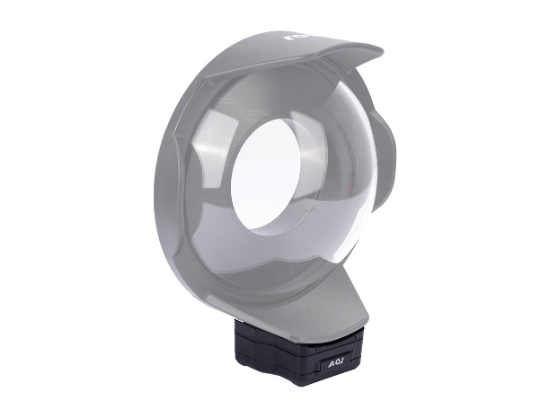
The AOI BYR-01 trim system for dome ports includes two sizes of base plate to attach to the dome port shade, the weight compartment which fits onto the base plates and a set of weights to allow for adjusting the trim to negate that uncomfortable tendency of dome ports to want to turn upwards.
For serious underwater videographers Nauticam make trim weights for attachment to the skids they produce for the Weapon and Epic L/T camera housings. Those are £260 for a pack of four 250g or 500g weights.
Users of older Canon and Fuji brand housings may well have weights that were available to negate the buoyancy of their compact camera housings. these usually bolted onto the tripod screw socket on the base of the housing.
PARTING SHOTS
Thank you as always for reading this blog. I’ve included all the buoyancy and trim systems that I’m aware of in the range of brands we currently sell.
Between these options it’s possible to get the buoyancy and trim of your underwater camera rig exactly how you want it, but you may have to spend quite a bit of money, especially if you are using a lot of different lens and lighting configurations.
A small simple camera setup for still photography may well be comfortable to use without adding any floats to it. But, larger setups for still or video will be a lot more comfortable to use if you commit some of your budget to getting it close to neutrally buoyant.
All prices in this article include UK VAT and were up to date at time of writing.
To order equipment, get quotes etc contact us by emailing info@alphamarinephoto.com
If you’d like to learn more about underwater photography we run courses online and workshops in the UK and overseas. Email us with any enquiries or use our contact form to get in touch and sign up to our newsletter.
We also run a Q and A group on Facebook which anyone is welcome to join if they obey the rules.
If you found this article useful, but are not planning to buy equipment from us or do a workshop you can give us your support though our ‘buy me a coffee’ page. Be aware links to Wex, MPB or eBay listings are affiliate links and we get a small percentage if you buy something through them.